
How to create a Konnector?: Step-by-step to Konnectify workflows
Welcome to our step-by-step guide on creating your first Konnector - and begin automating your work. This guide is designed to help beginners and advanced users understand how to create a Konnector from the ground up, utilize our AI-driven suggestions, leverage templates, and customize your workflow to fit your needs. Let’s dive in!
What is a Konnector?
A Konnector is an automated workflow that links your apps and services, triggering actions based on specific events. Each Konnector consists of a trigger followed by one or more actions. When activated, the Konnector executes these actions each time the triggering event occurs.
To get started, first create a Konnectify account
Create a Konnectify Account:
- Head to the Konnectify website - https://www.konnectify.co/
- New customers can click the "Get Started for Free " button on the website to create a Konnectify account or sign up from here.
(Register with your email address or use Google or Microsoft accounts for SSO Login.) - Existing customers can click on the “Login” button.
Once the process is complete, you can follow the steps to build your first Konnector.
How to start creating a Konnector?
There are 2 ways you can build a Konnector:
- Visual Workflow Builder: Start with a blank canvas to fully customize your Konnector and ensure it meets your specific workflow requirements.
- AI-Assisted Konnector Builder: Describe your workflow needs in conversational language, and our AI will recommend suitable triggers and actions.
Create your Konnector via Visual Workflow Builder
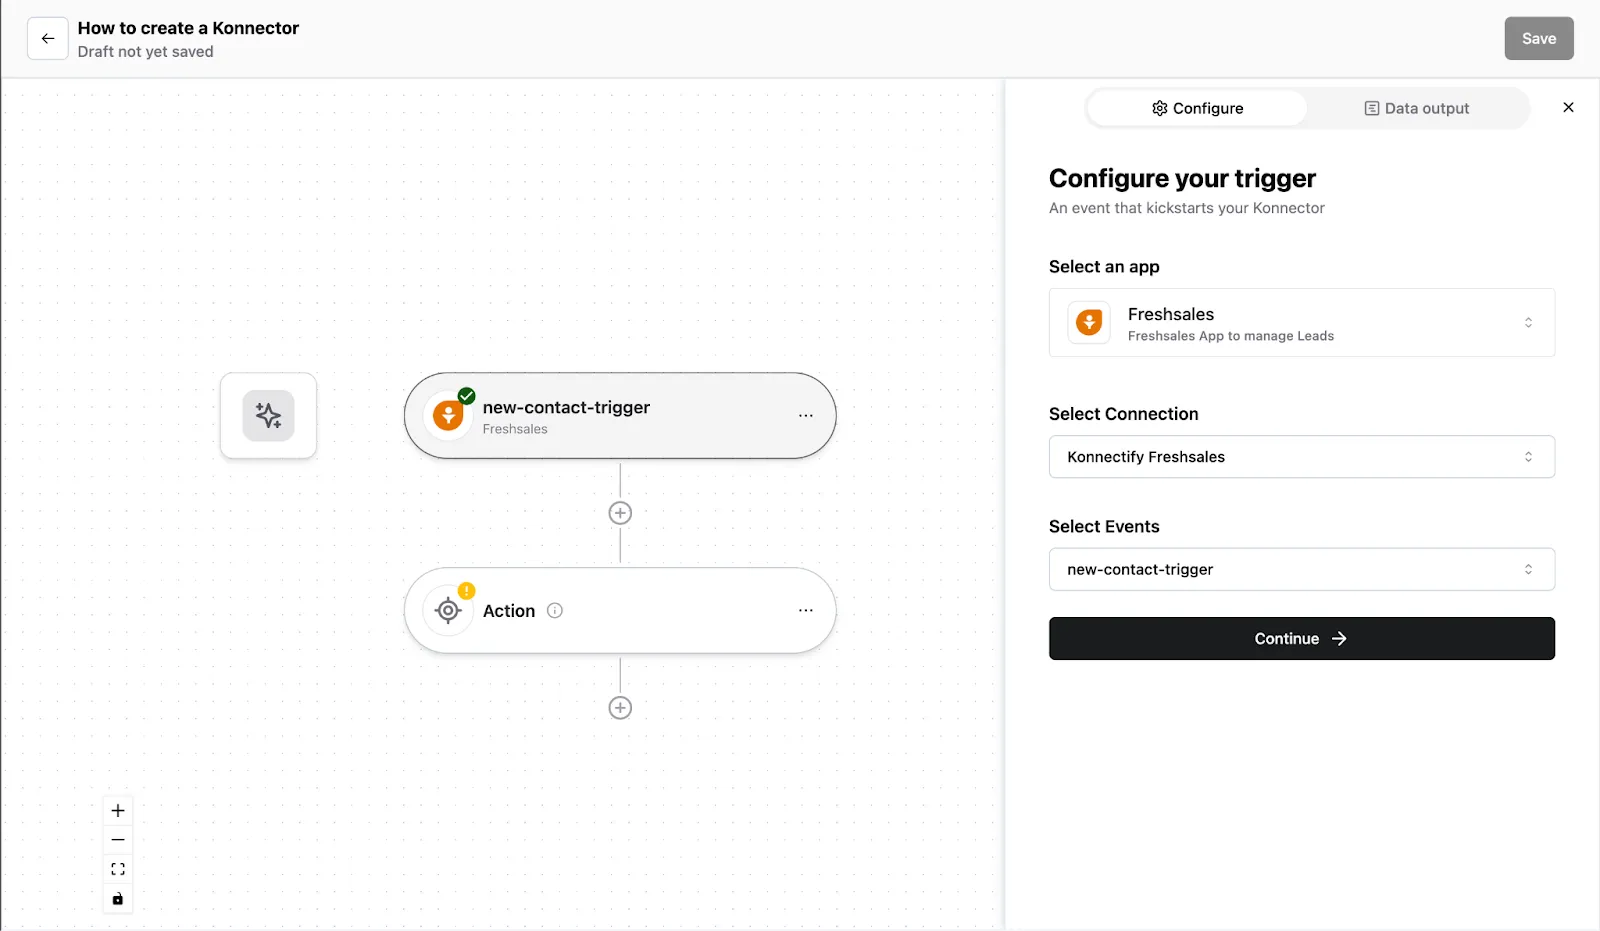
Step 1: Define a Trigger
- Select your Trigger App: Identify the application where the initiating event will occur.
- Choose the Trigger Event: Specify the event within the chosen app starting the Konnector.
- Authenticate your app: Connect your app with the necessary information
- Map the data: Map the data to relevant fields and ensure the data is mapped correctly
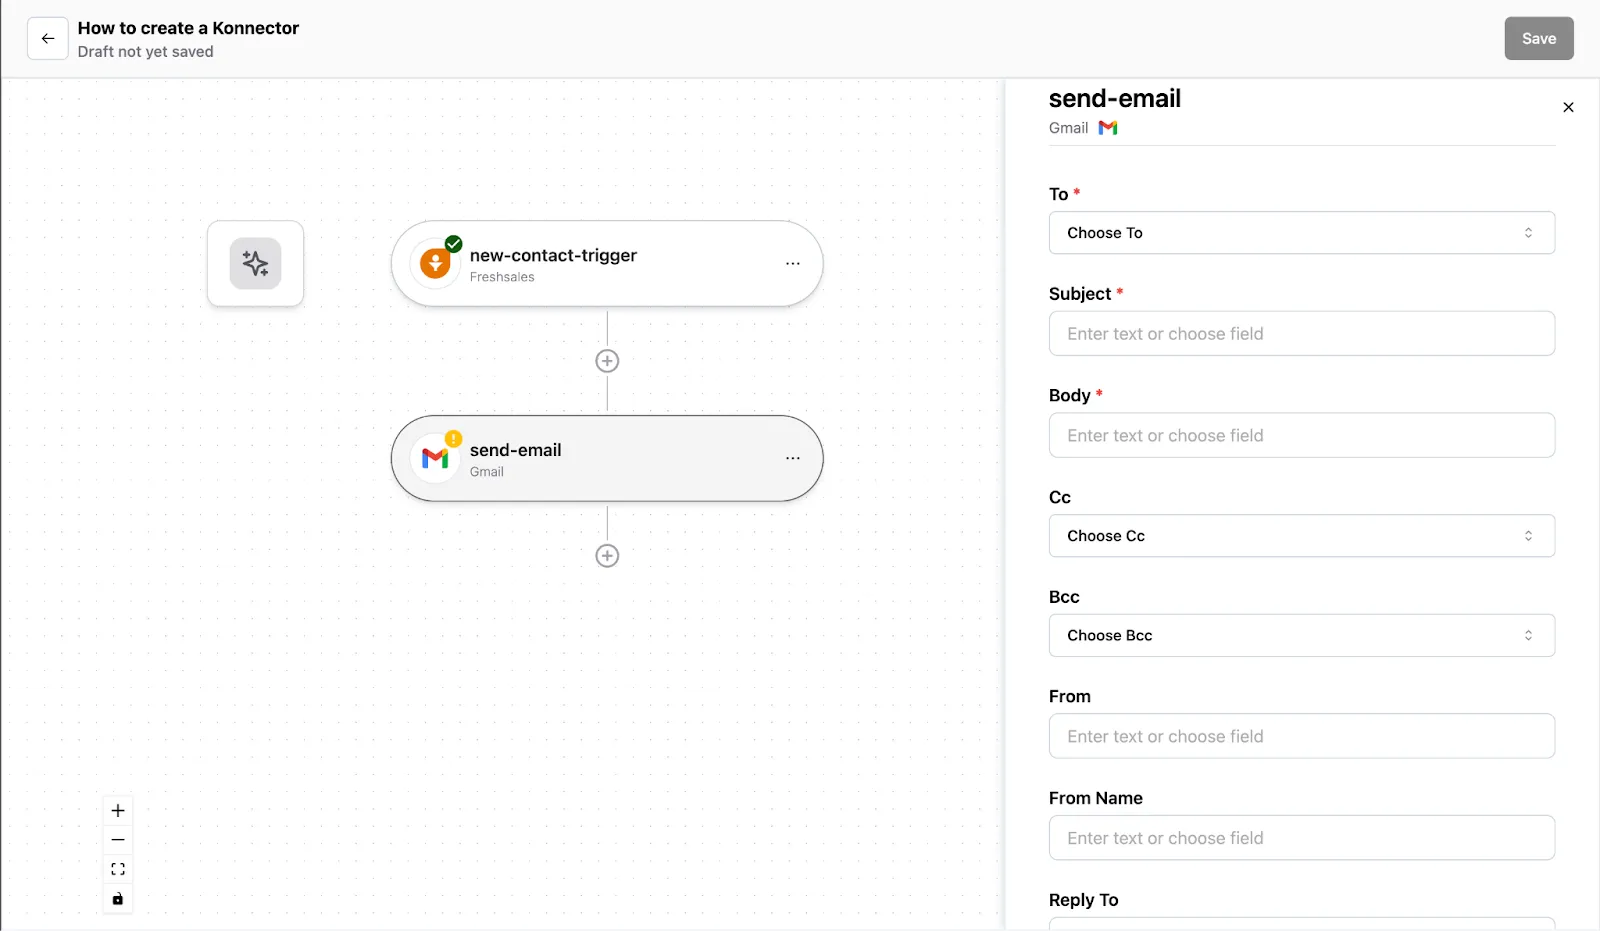
Step 2: Set up an Action
- Add the Action App: Select the application where the Konnector will execute actions upon being triggered. You can add unlimited steps to a Konnector.
- Choose the Action Event: Decide on the specific action the Konnector will undertake in the chosen application.
- Authenticate your app: Connect your app with the necessary information
- Map the data: Map the data to relevant fields and ensure the data is mapped correctly
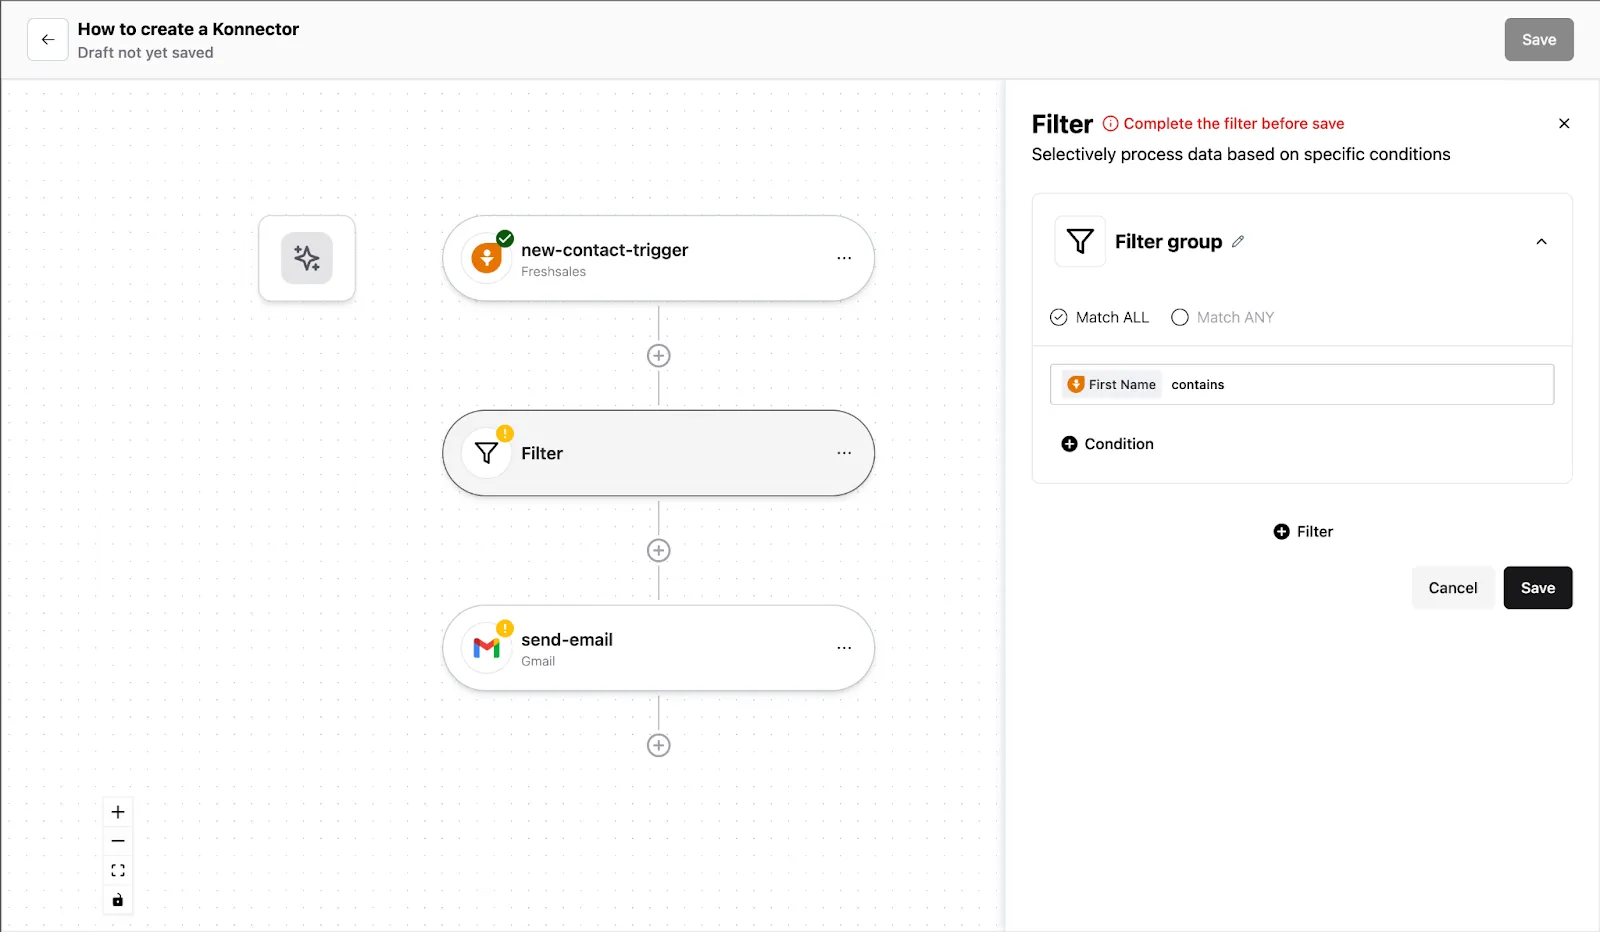
Step 3: Expand your workflow with Additional actions (Optional)
- Add further actions: Enhance your workflow by adding more steps.
- Add Search actions: Locate and utilize existing app data.
- Put conditional Filters: Execute Konnector actions based on specific conditions.
- Choose Paths: Create diverging action sequences based on varying conditions (available on select plans).
- Format your data: Ensure data gets passed on appropriately across applications.
Step 4: Give your Konnector a name
Assign a distinctive, simple name to your Konnector so that you can find it easily in your Dashboard.
Step 5: Launch your Konnector
You have everything ready. Just publish and switch it on.
You have successfully created a Konnector! It will now autonomously perform tasks every time the specified trigger event occurs, significantly streamlining your workflows.
If you’re slightly confused about which app should be your trigger app or action app, you can also use the AI builder.
Create your Konnector via AI Konnector-builder
- Input your workflow description in natural language.
- The AI builder will create a basic workflow based on the available apps and your needs.
- Now you can connect and authenticate your apps
- Map the data correctly
- And hit publish,
For additional support or customization advice, reach out to our support team.
Welcome to the world of effortless automation!