
Connect Salesforce using Konnectify
With Salesforce and Konnectify integration, you can
- Create Account, Contact, Task, Lead and Opportunity
- Update and Delete all the events in Salesforce
- Find the Contacts by specific criteria like ID, Email, Mobile Number, and Query
- And a lot more
Why connect with Konnectify?
You can set up elaborate automation in minutes. With Konnectify and Salesforce integrated, the sky is the limit.
- Automate leads to opportunity conversion and follow-up tasks upon lead creation.
- Send automated alerts and tasks to account managers for updated accounts or contacts.
- Create real-time dashboards for sales and customer service performance tracking.
To create Konnectors with Salesforce you must first have a Salesforce account.
Go to https://www.salesforce.com/signup if you don’t have one.
Getting started
Connecting your Salesforce account to Konnectify
To get started with automating, integrate Salesforce with Konnectify,
- Log in to your Konnectify account. If you don’t have one, sign up here
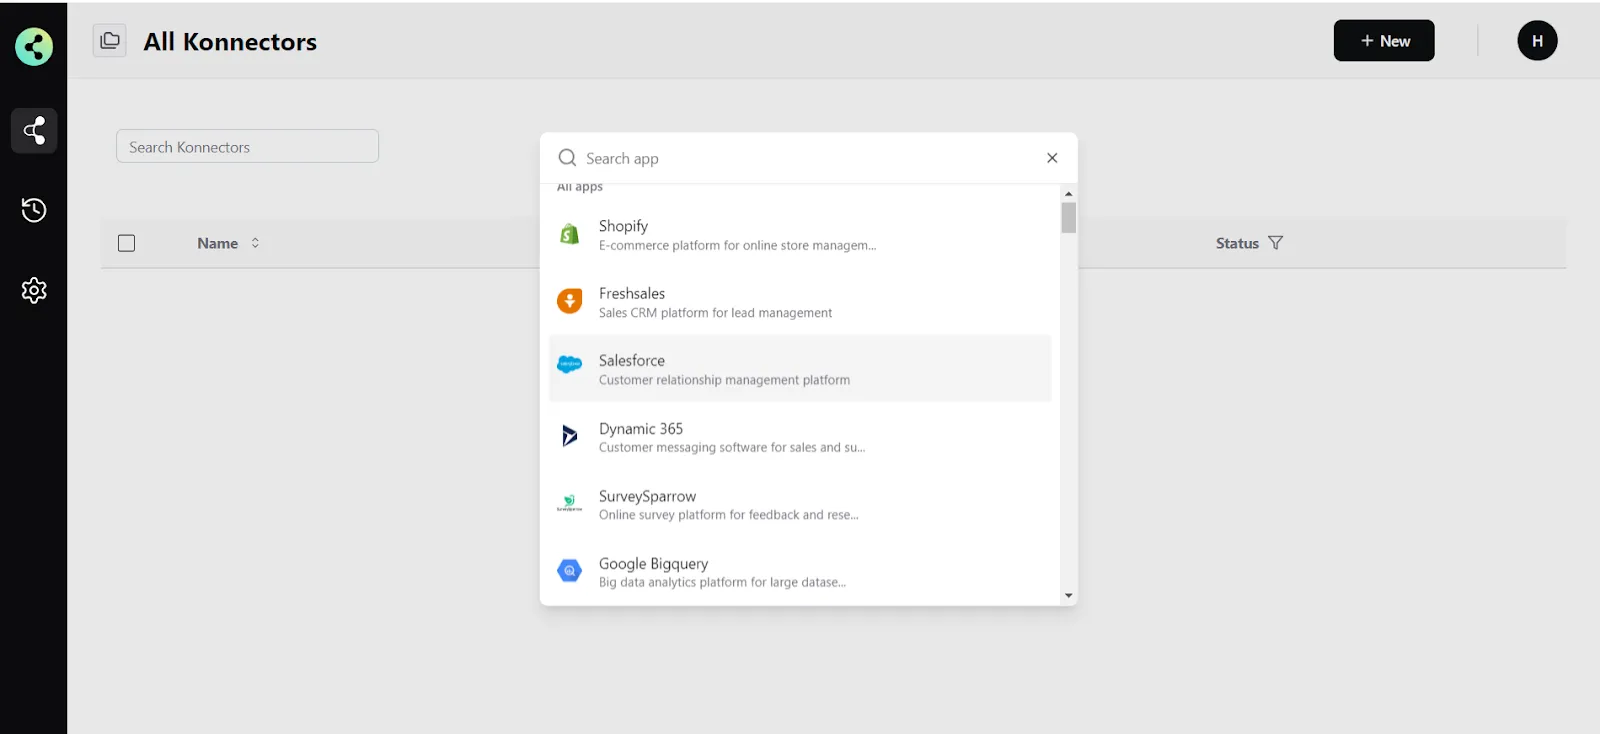
- On the top right of your dashboard, click on New > New Connection

- Select "Salesforce" from the dropdown. A new pop-up will open for you to add your Salesforce credentials.
- Now you need to add your Salesforce app credentials (You can find all of these in your Salesforce dashboard)some text
- Connection Name - give a name to this connection. For example:
“Salesforce connection” - Base URL - This is your Salesforce domain URL. It will look like this - https://yourcompany.my.salesforce.com
- Connection Name - give a name to this connection. For example:
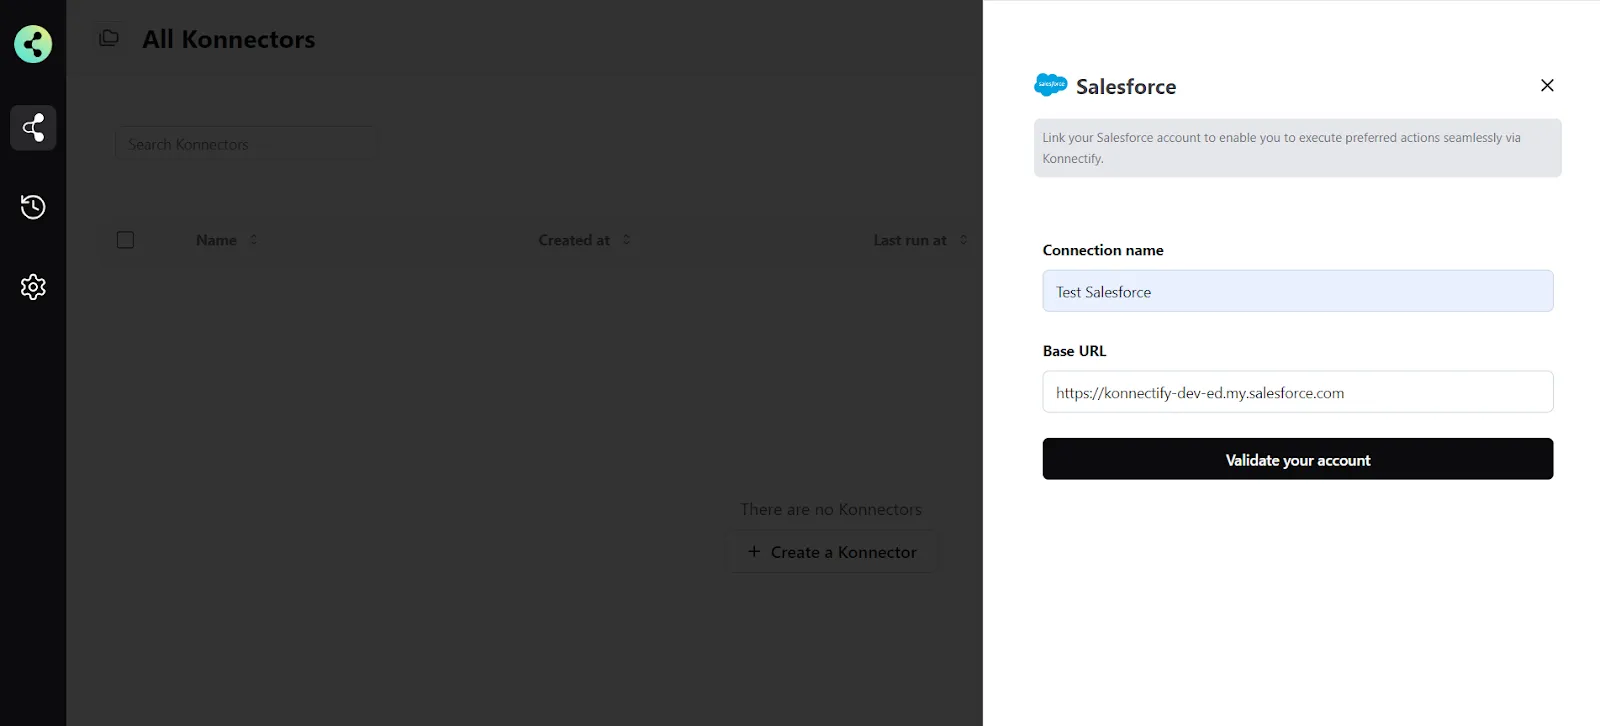
- Click on "Validate your account" to test the connection and save your account.
You have successfully set up a connection with Salesforce in the Konnectify dashboard. Now you are ready to start creating Konnectors.
Create a new Konnector
Workflows in Konnectify are called Konnectors. You can build one easily.
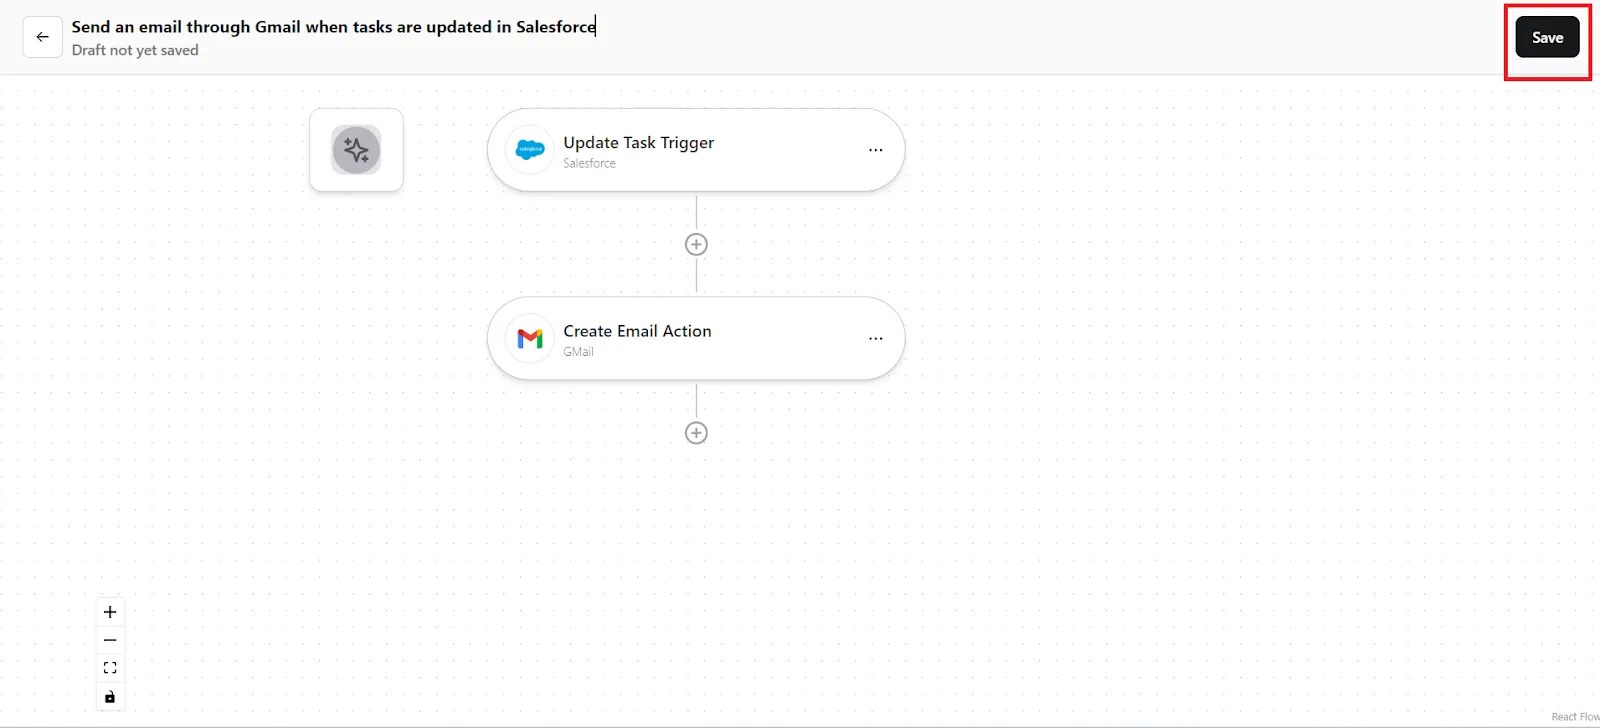
Let’s take an example to put this together. Say you want to “Send an email through Gmail when tasks are updated in Salesforce”. Here the “Task updated” is the Trigger in Salesforce (which kicks off your workflow) and “Send email” is the Action in Gmail.
Step 1: Create a new Salesforce trigger
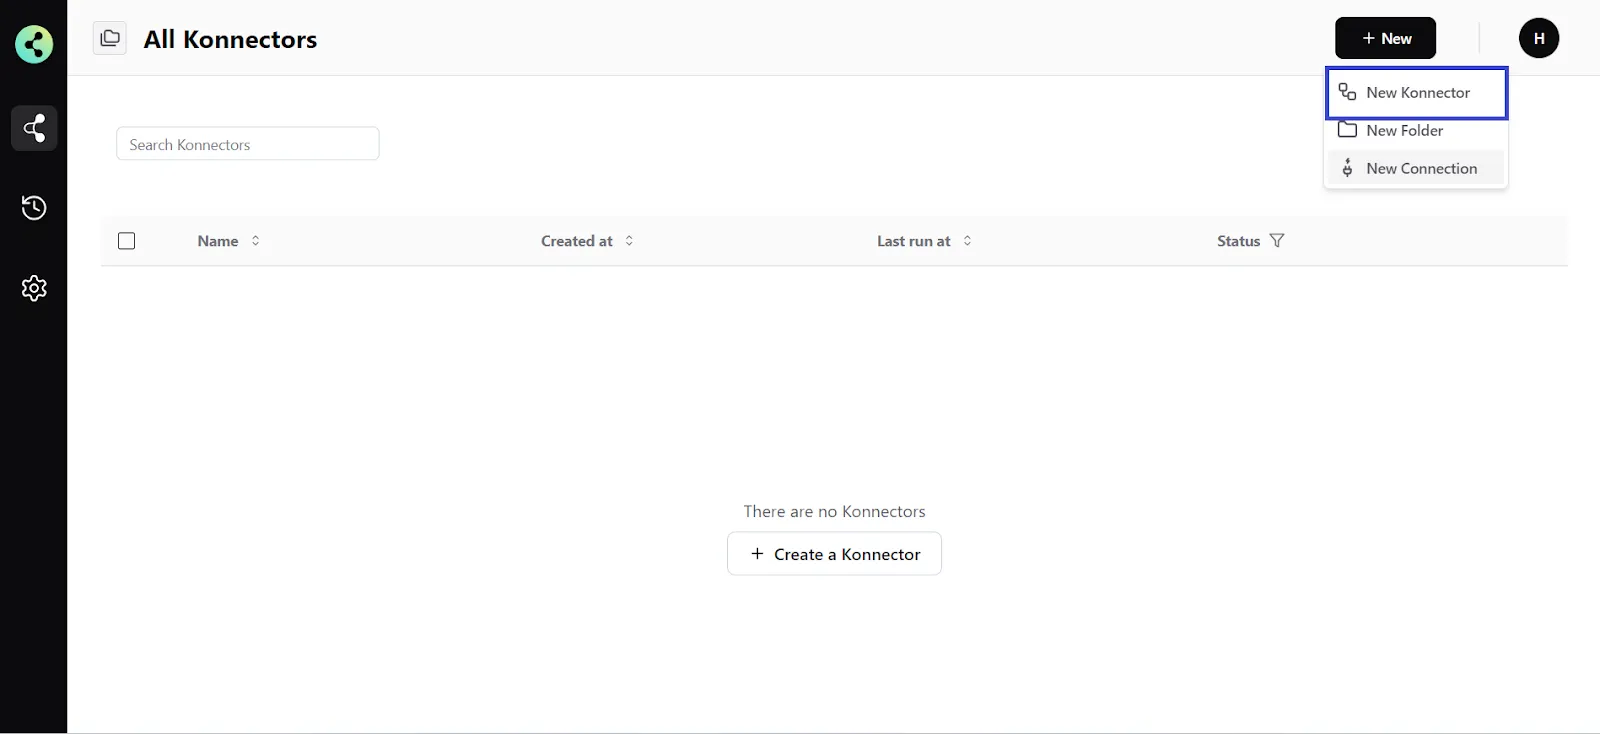
- On the top right, click on New > New Konnector.
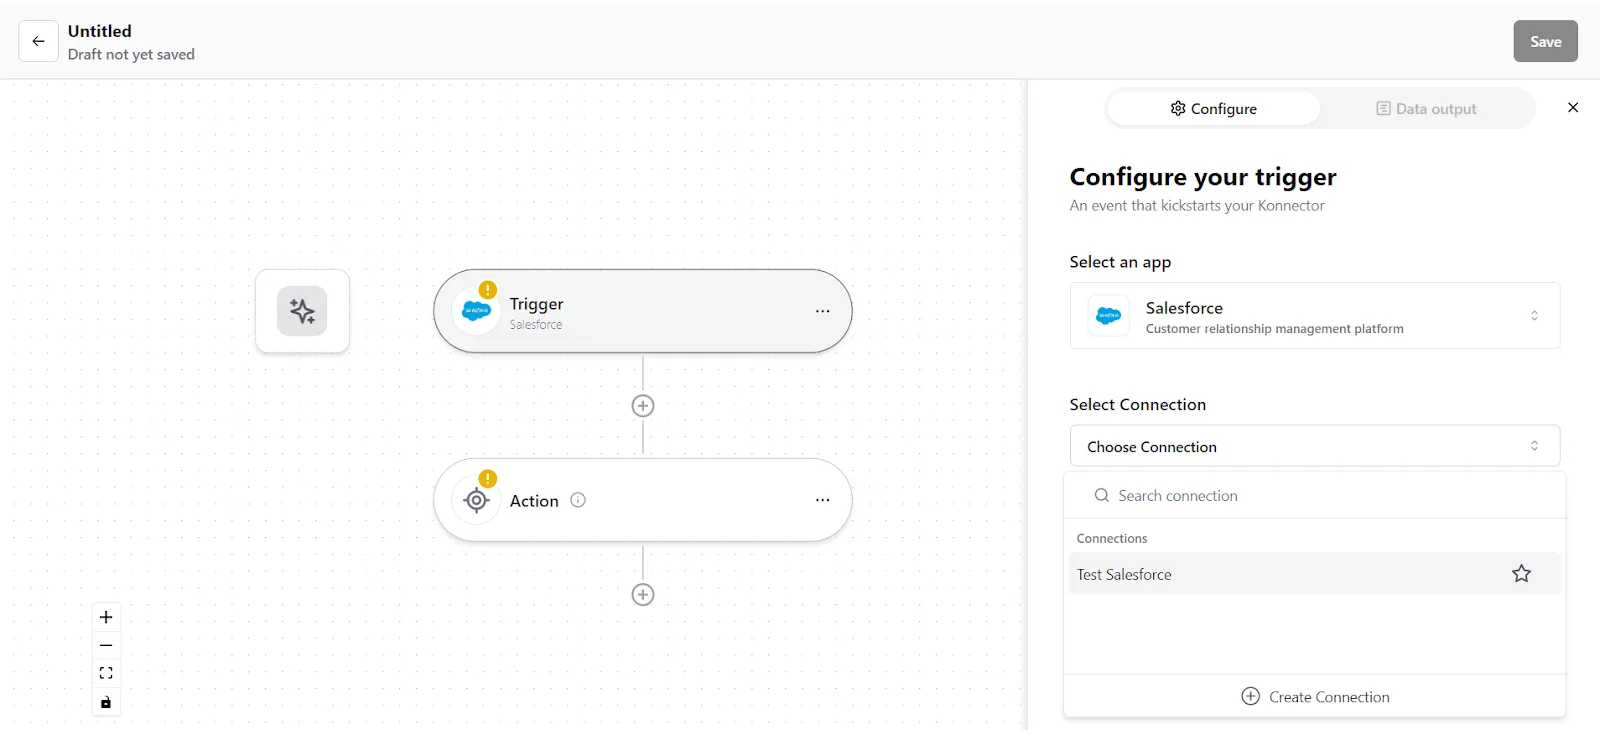
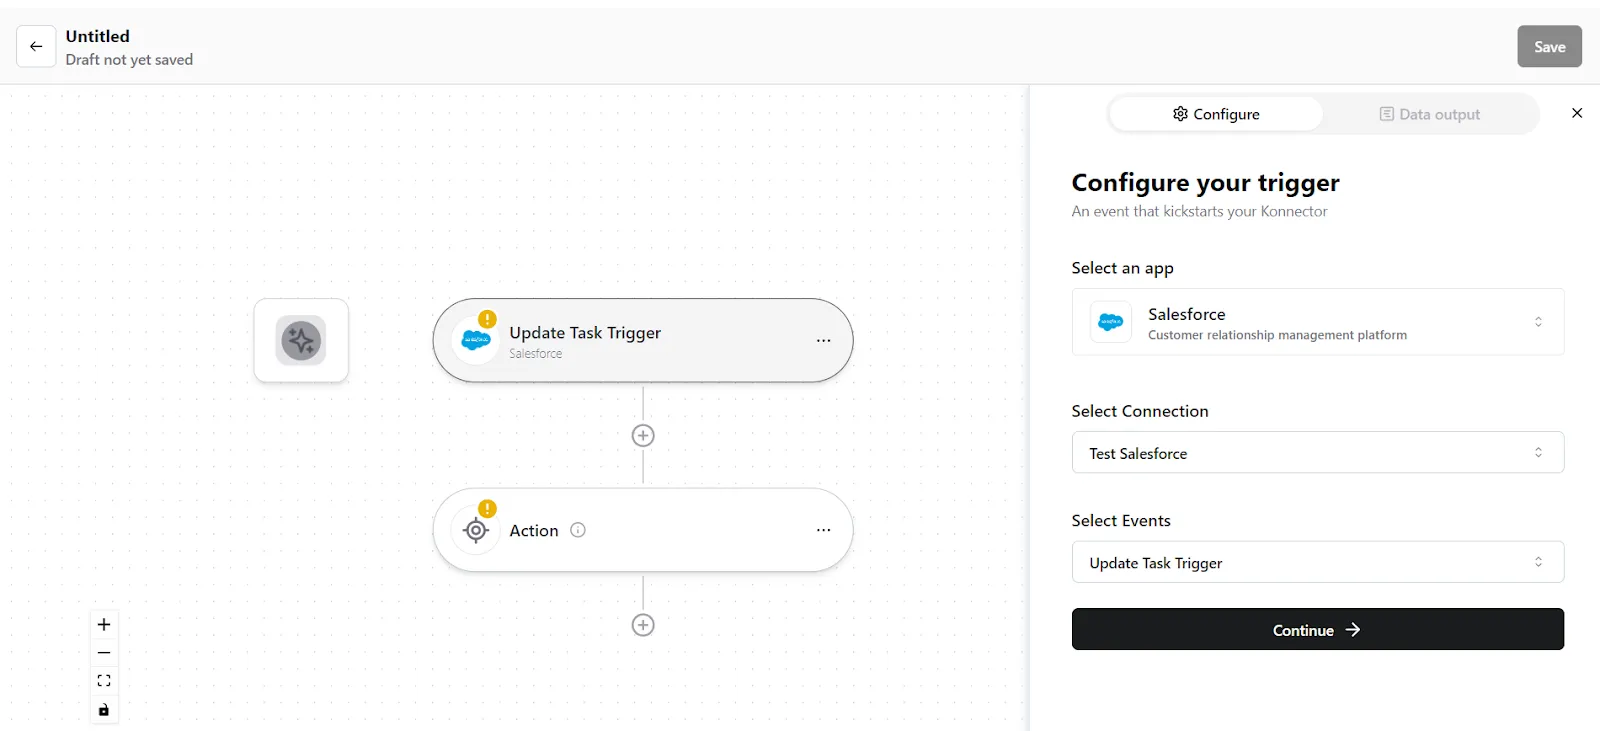
- Configure your trigger. Select Salesforce as the Trigger app. (Please ensure your Salesforce connection is validated and live)
- Choose the app connection name that you had set up previously. For example, “Salesforce connection”
- Select the trigger event as "Task updated", and click on “Continue”. You will be taken to the data mapping pop-up.
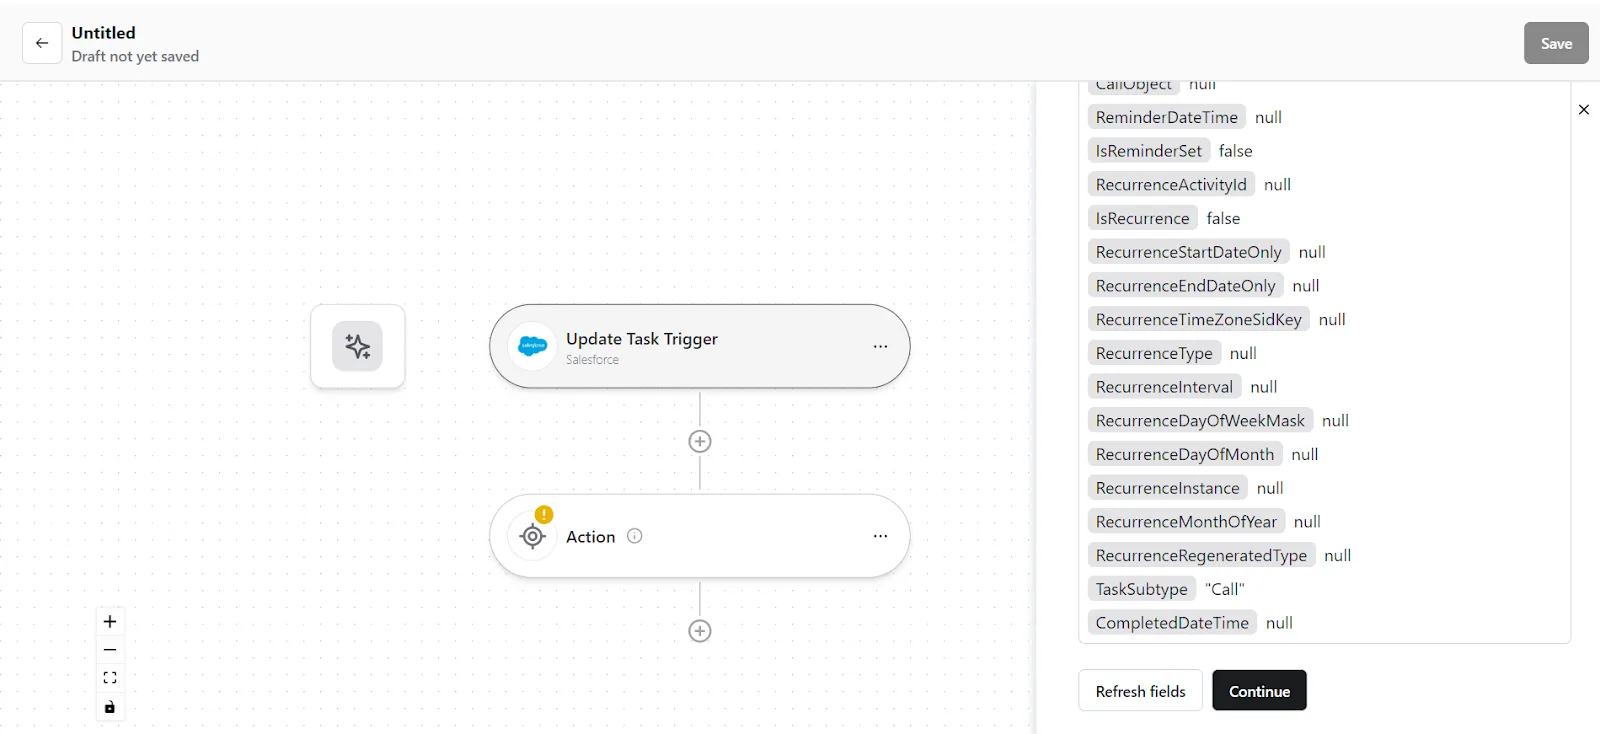
- Konnectify will show you the Data output with existing data or sample data. If you have no data in the Salesforce account, then please add it to validate the same.
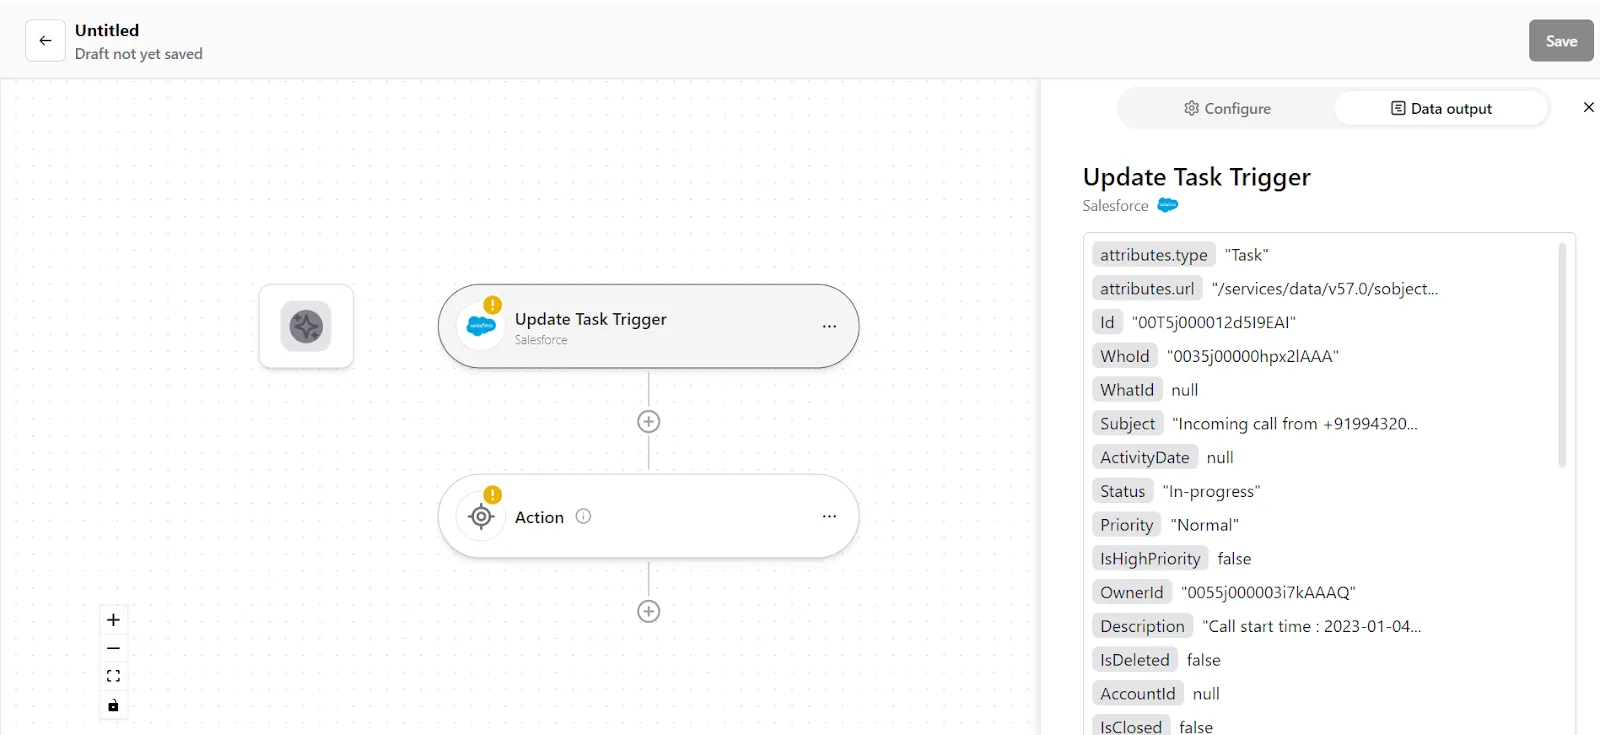
- Once mapped data is available, click on "Continue".
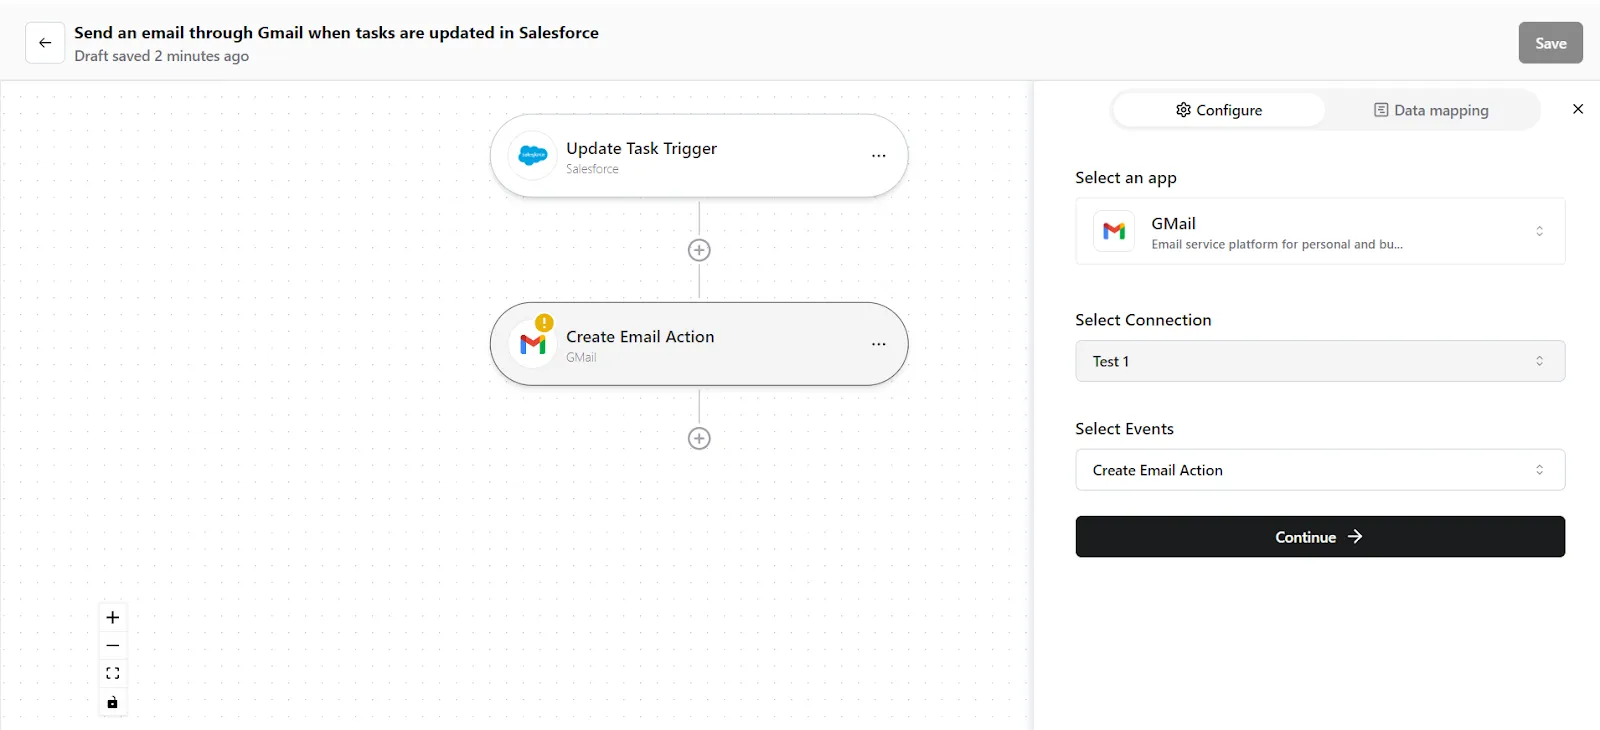
Step 2: Create a new Action
- On your Konnector canvas, click on the "Action" section.
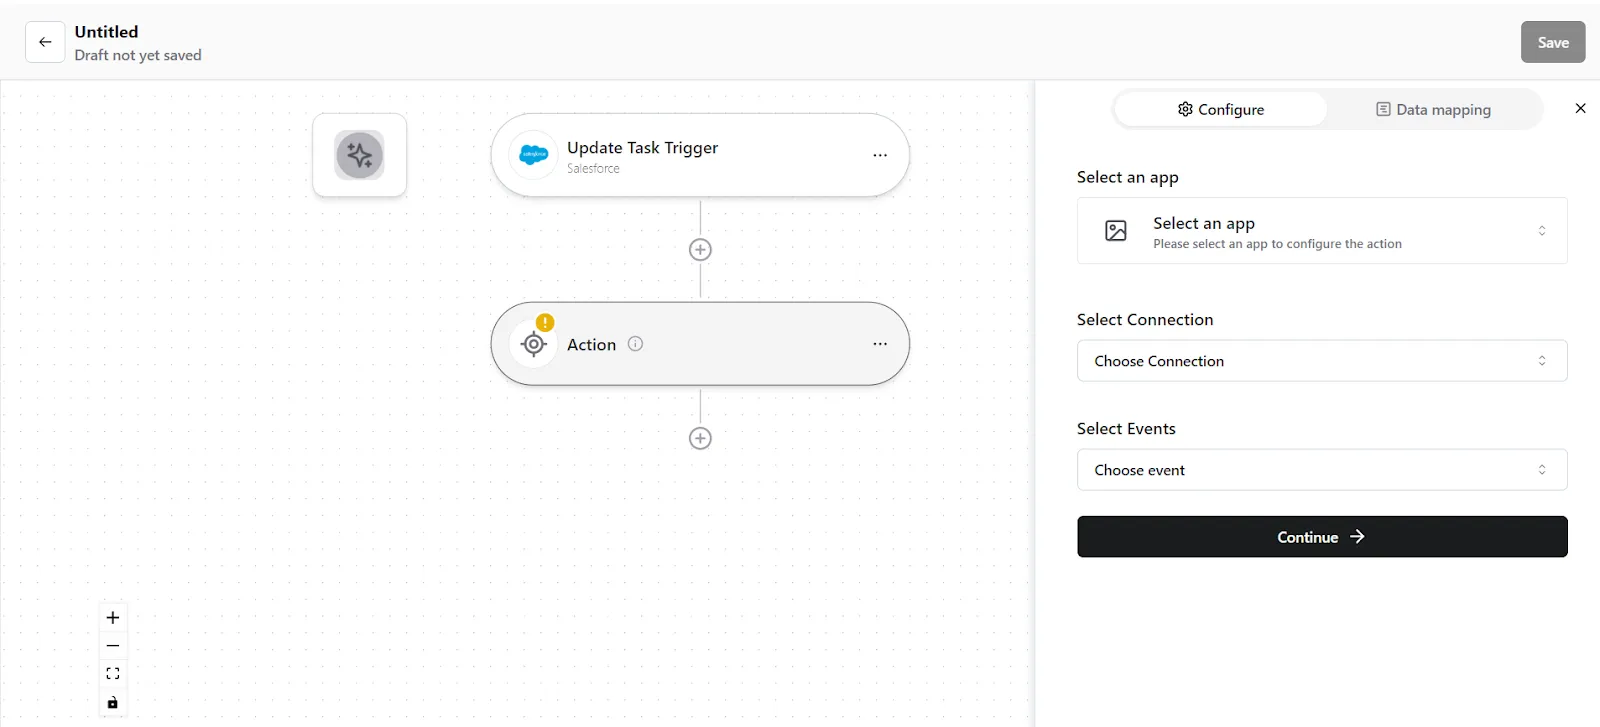
2. Configure your action. Select Gmail as the Action app. (Please ensure your Gmail connection is validated and live)
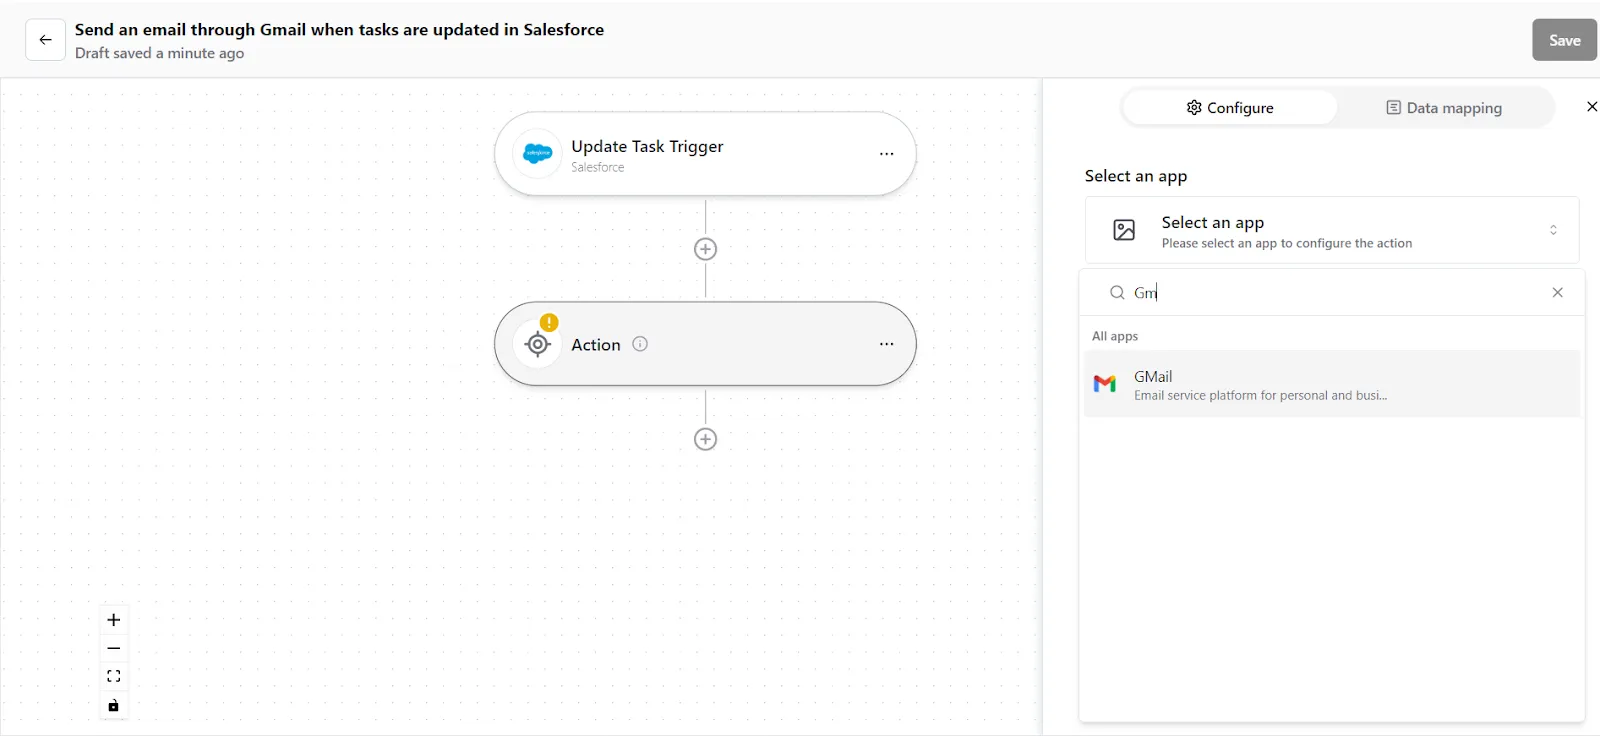
- Choose the app connection name that you had set up previously. For example, “Gmail connection”
- Select the action event as "Send Email", and click on “Continue”. You will be taken to the data mapping pop-up.
5. You can see the mapped data from your Salesforce records. Check whether the right details have been added in the relevant fields, change it by clicking in the field.
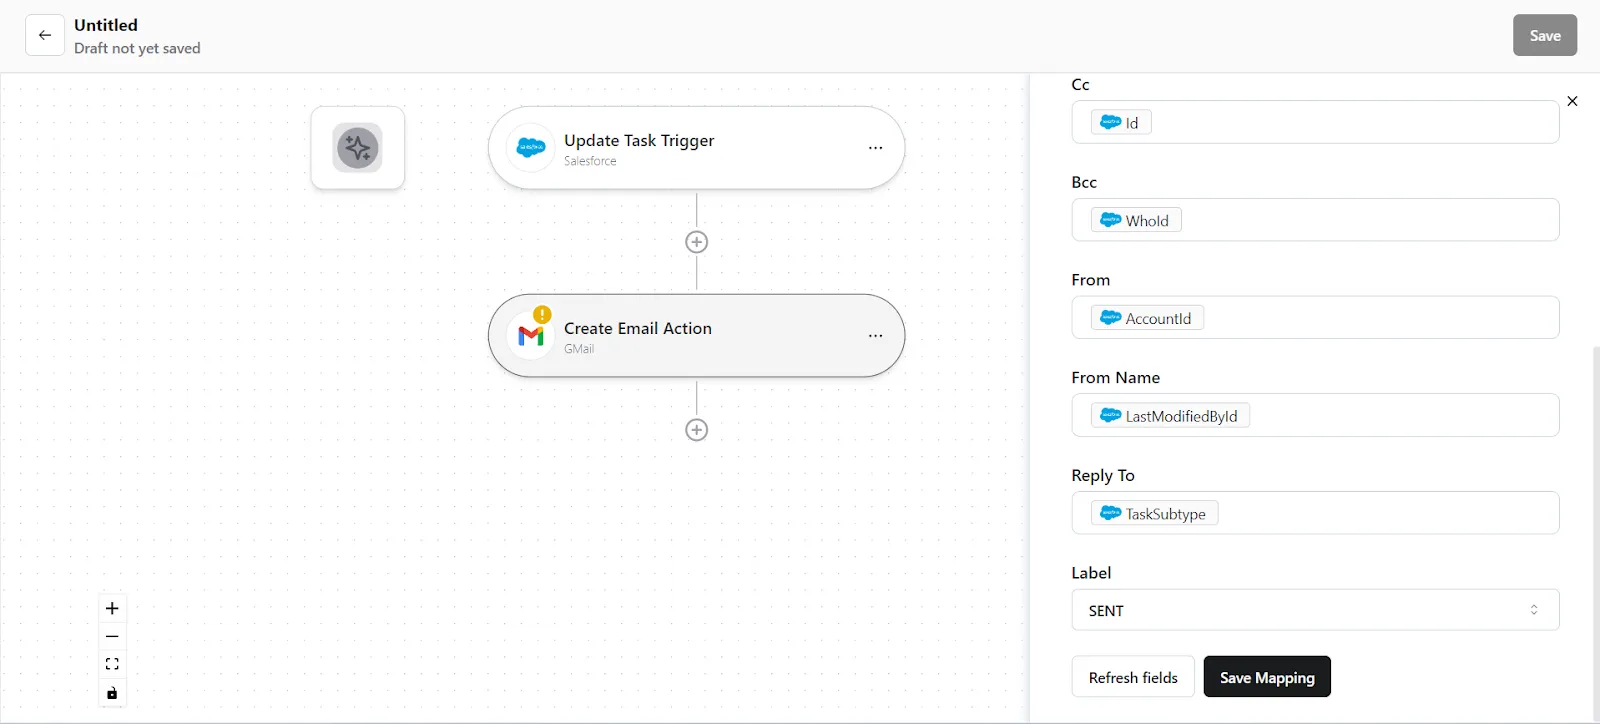
6. Once you are done, click on “Save Mapping”. Now your Action is ready.
Step 3: Save your Konnector
- Once you have set up your Konnector, give it a name. For example: “Send an email through Gmail whenever tasks are updated in Salesforce”.
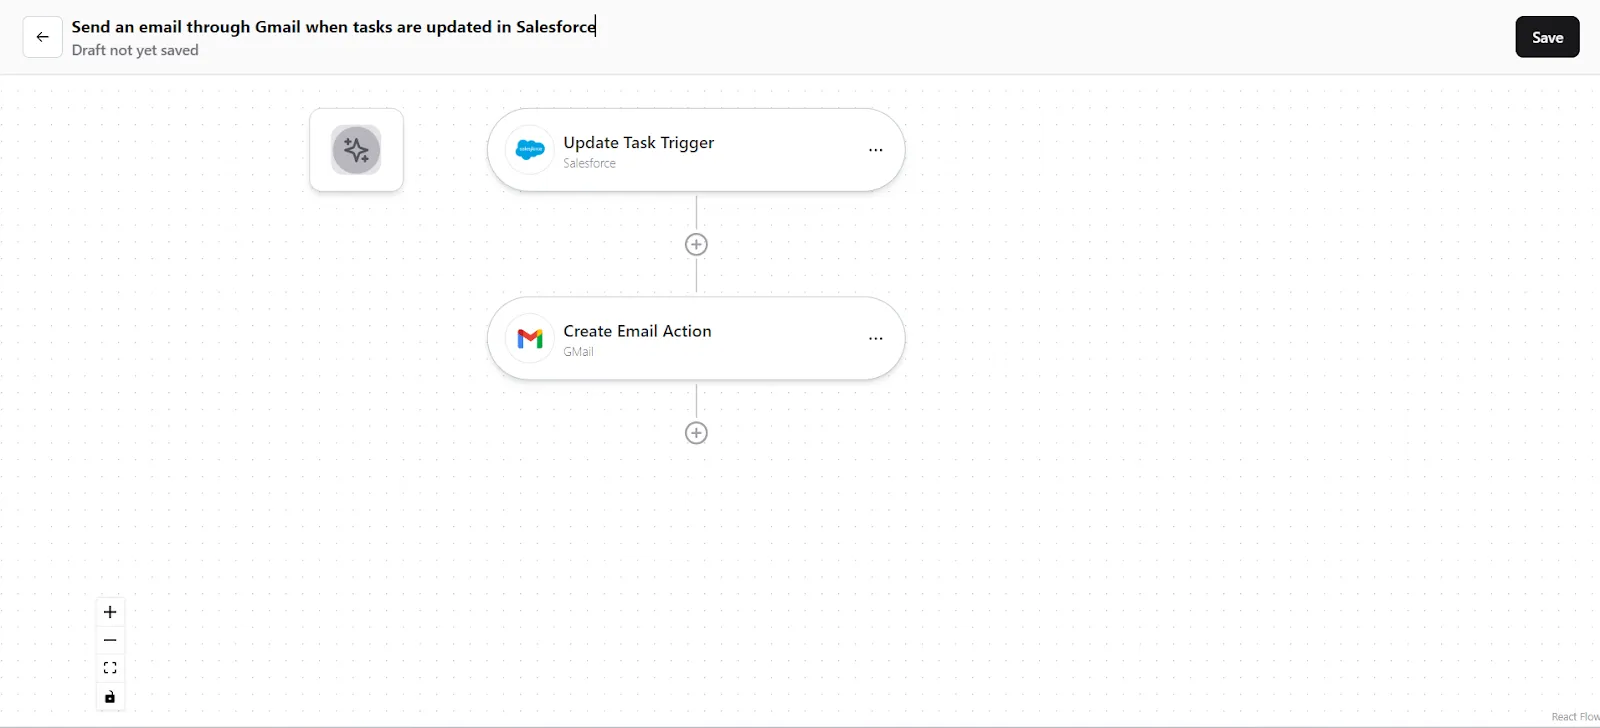
- Click on the "Save" button in the top right corner, to save your entire Konnector.
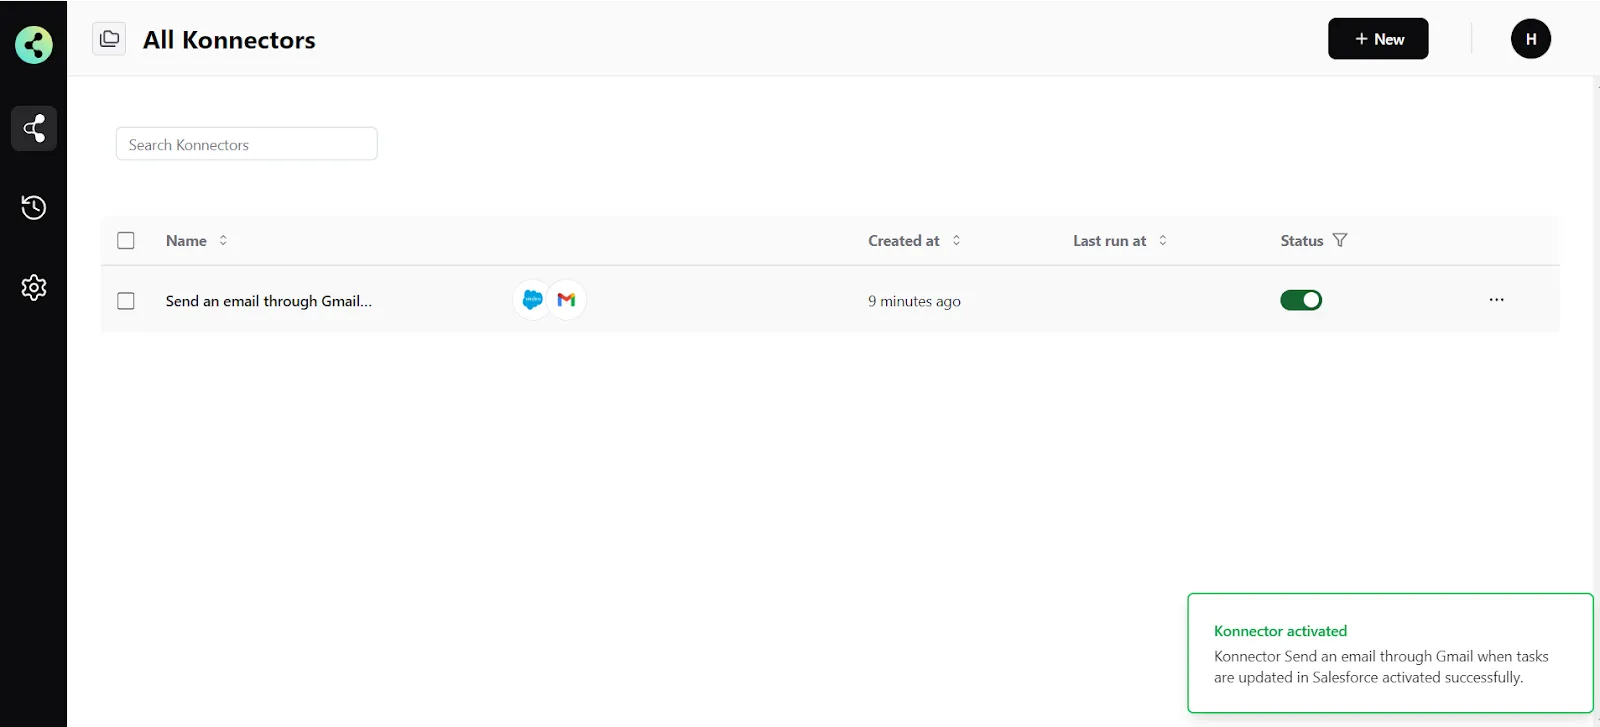
- Now you will be taken to the “All Konnectors” page. Here you can see all the Konnectors you have put together. To activate your Konnector, turn on the Status toggle.
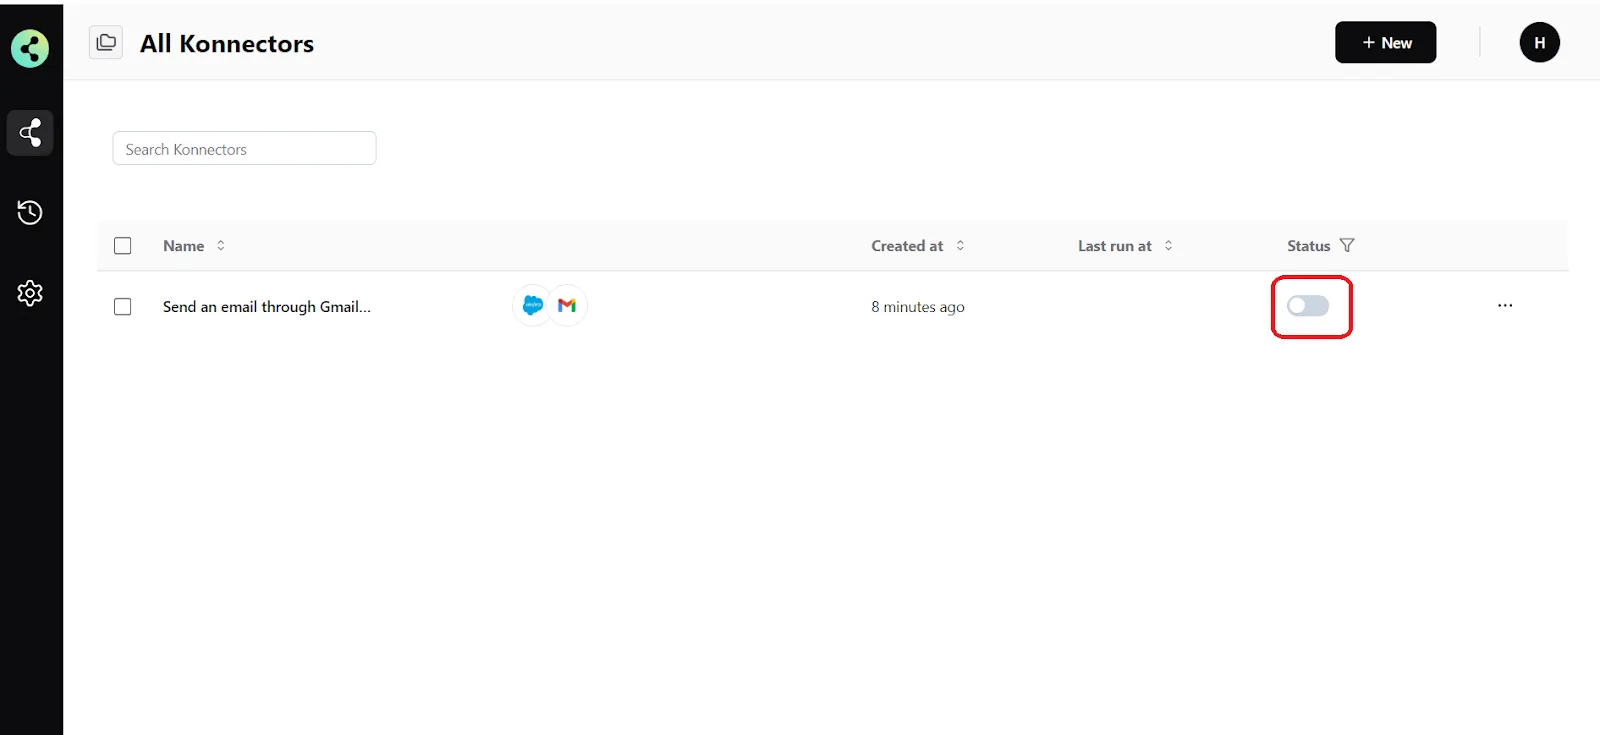
- You will get a success notification saying “Konnector Activated”
Connect your Salesforce account to 100+ applications such as QuickBooks, HubSpot, Stripe, etc, and build automation.
Commonly Asked Questions
Q. How does the Salesforce integration work with Konnectify?
Konnectify is a no-code SaaS integration platform. You can connect Salesforce and other apps on Konnectify, automate tasks through triggers and actions, and more. Create account profiles, and task details, add contact details, update deals, fetch opportunities, and do much more with the Salesforce integration on Konnectify.
Q. Why should I connect Salesforce with Konnectify?
Connecting Salesforce with Konnectify enables you to automate complex workflows with ease, thanks to hundreds of triggers and actions. For example, you can automatically add leads to a nurturing campaign, create follow-up tasks for sales reps, or manage project development tasks. This integration helps you save time, reduce errors, and enhance productivity.
Q. Can I map custom data fields between applications using Konnectify?
Yes, you can map custom data fields between applications. When setting up an action in your Konnector, you have the option to map custom attributes either via source (mapping fields from earlier triggers or searches) or via fixed (mapping a fixed value).
Q. How do I troubleshoot connection issues between Salesforce and Konnectify?
If you encounter connection issues, ensure your Salesforce app credentials are correct and that you have given the necessary permissions. If the issue persists, contact us at support@konnectify.co