
Connect Freshdesk using Konnectify
With Freshdesk and Konnectify integration, you can
- Create a Company, Contact, Forum, Ticket, and much more
- Update, Assign, and Reassign all the tickets in Freshdesk
- Find the Company details by specific criteria like ID, Email
- And much more
Why connect with Konnectify?
You can set up elaborate automation in minutes. With Konnectify and Freshdesk integrated
- Automatically assign tickets to the appropriate support agent based on specific criteria like customer priority.
- Integrate with CRM platforms to provide a unified view of customer interactions and history for personalized support.
- Send ticket-related information through communication channels
To create Konnectors with Freshdesk you must first have a Freshdesk account.
Go to https://www.freshworks.com/freshdesk/signup/ if you do not have one.
Getting started
Connecting your Freshdesk account to Konnectify
To get started with automating, integrate Freshdesk with Konnectify,
- Log in to your Konnectify account. If you don’t have one, sign up here
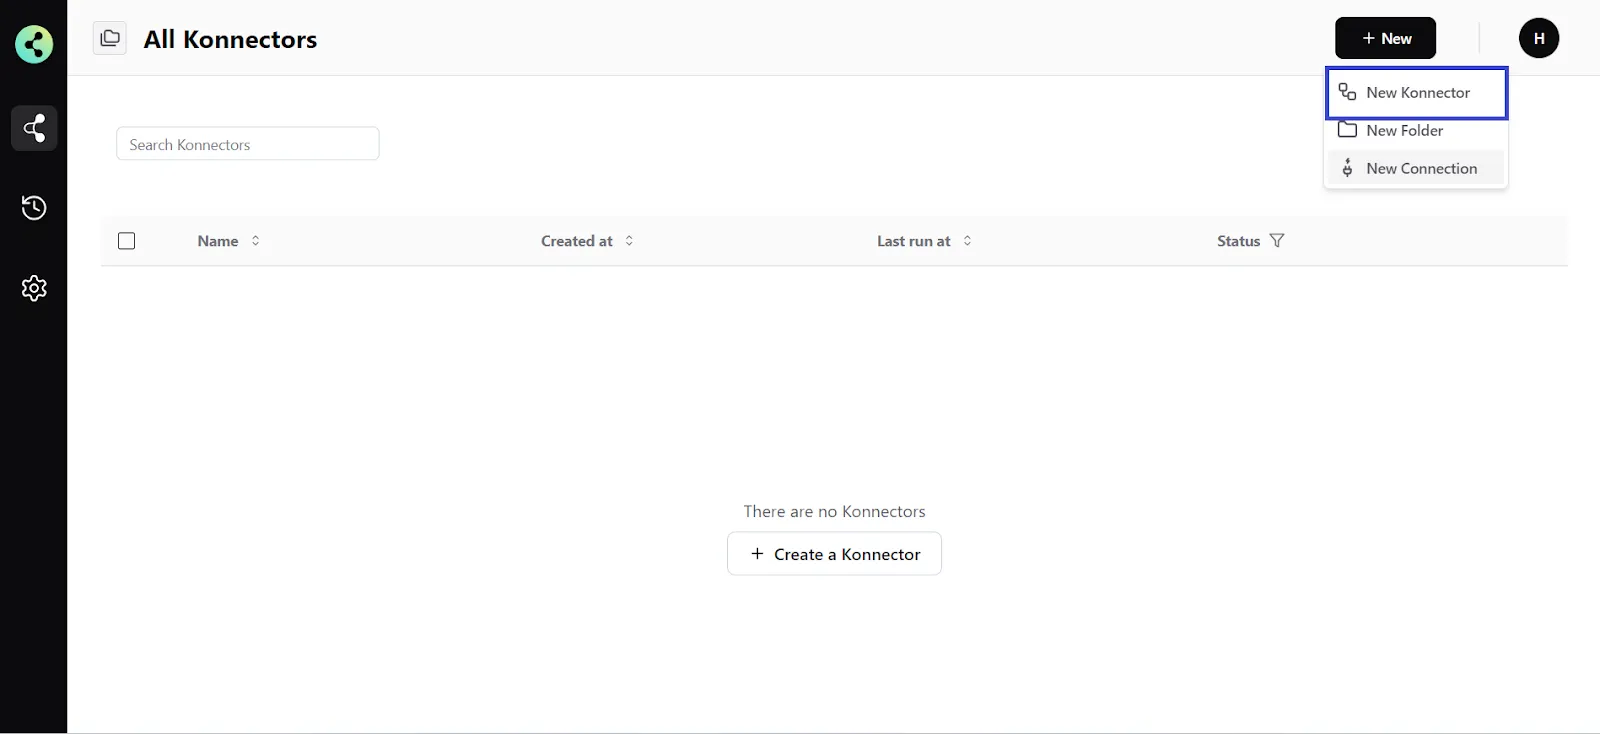
- On the top right of your dashboard, click on New > New Connection

- Select "Freshdesk" from the dropdown. A new pop-up will open for you to add your Freshdesk credentials.
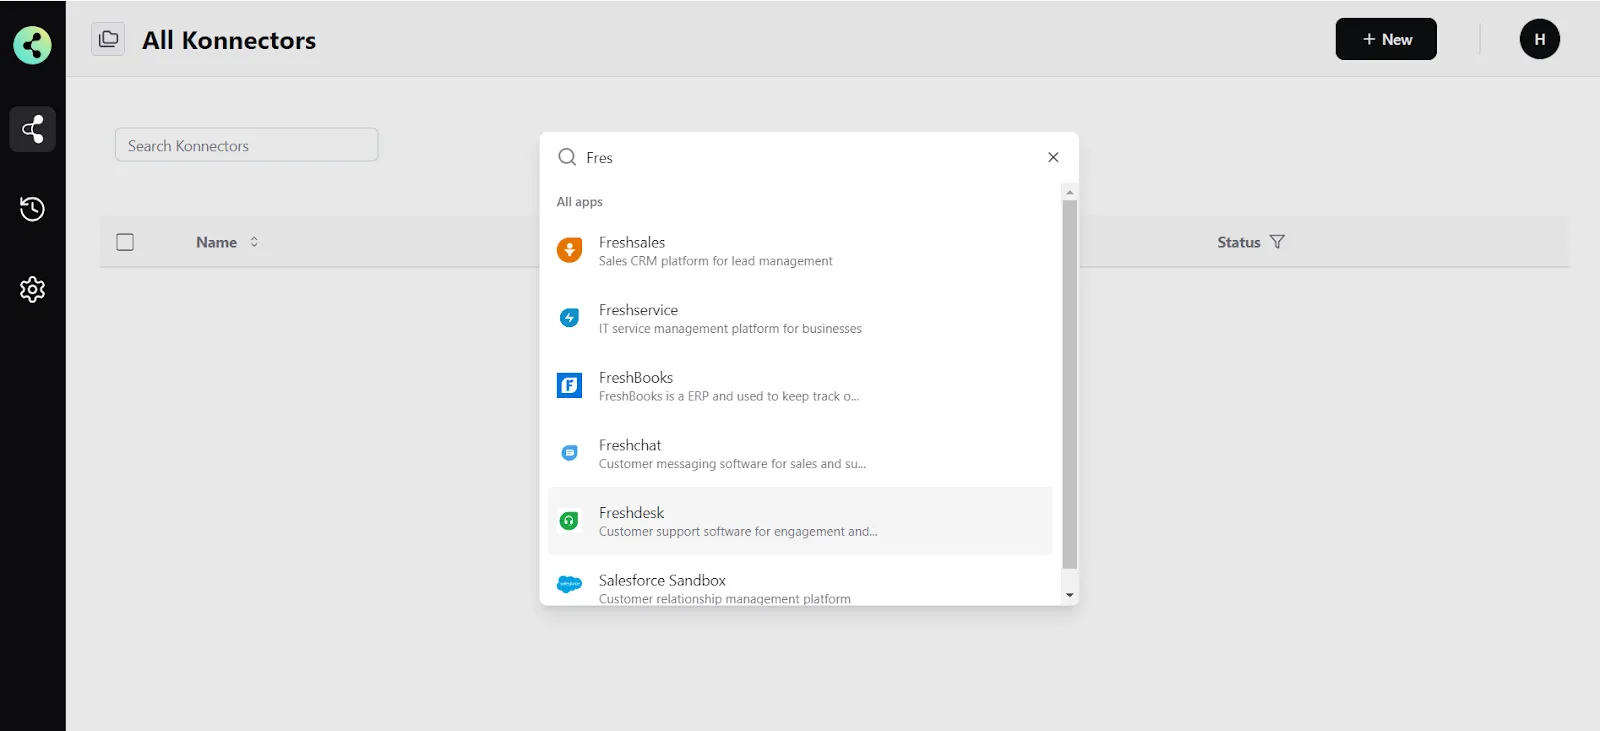
- Now you need to add your Freshdesk app credentials
(You can find all of these in your Freshdesk dashboard)some text- Connection Name - give a name to this connection. For example:
“Freshdesk connection” - Base URL - This is your Freshdesk domain URL. It looks like this - https://yourdomain.freshdesk.com/api/v2
- API Key - you can generate from your Freshdesk accoun
- Connection Name - give a name to this connection. For example:
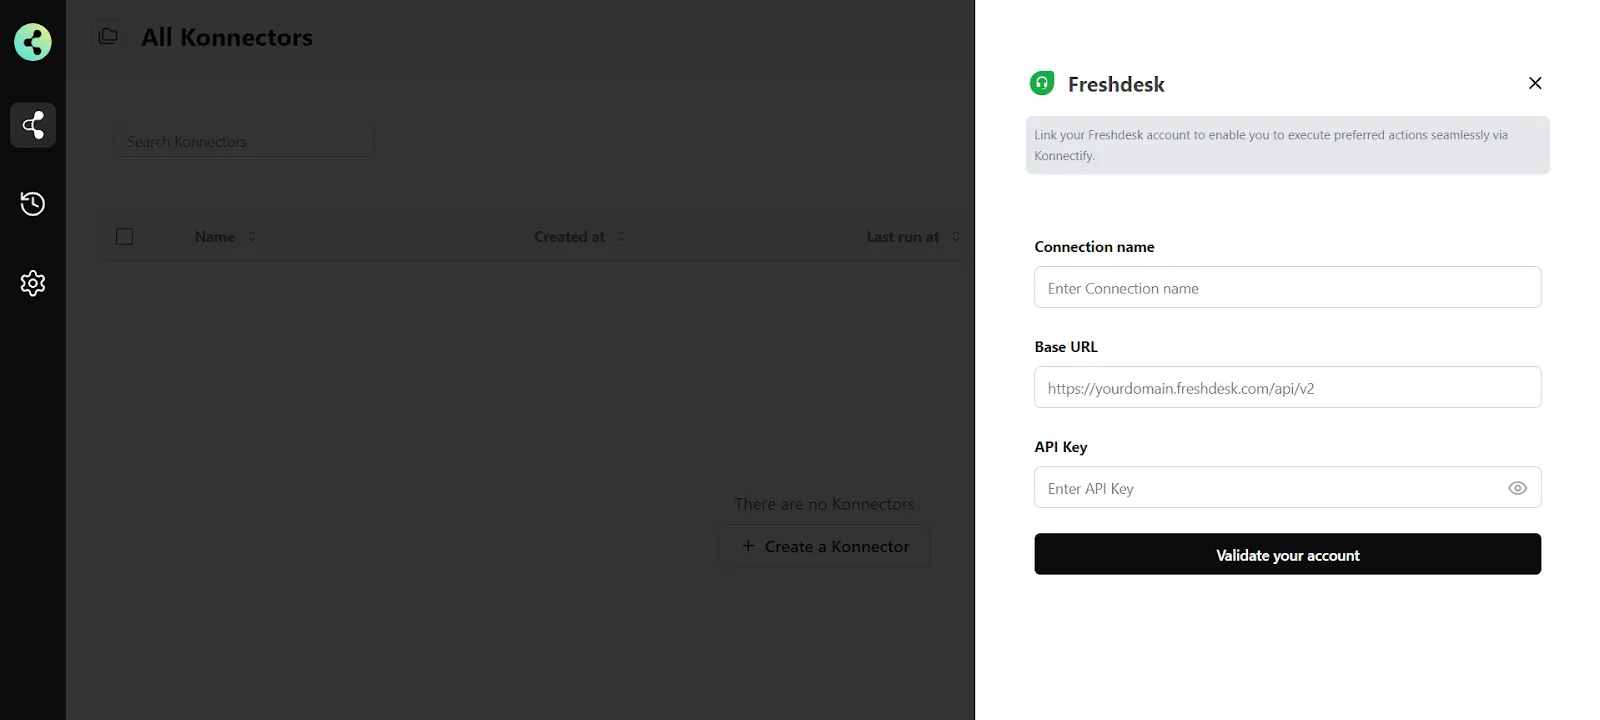
- Click on "Validate your account" to test the connection and save your account.
You have successfully set up a connection with Freshdesk in the Konnectify dashboard. Now you are ready to start creating Konnectors.
Create a new Konnector
Workflows in Konnectify are called Konnectors. You can build one easily.
Let’s take an example to put this together. Say you want to Create Freshdesk tickets for every new Shopify orders. Here the “New Order Made” is the Trigger (which kicks off your workflow) in Shopify and the “Create Ticket” is the Action in Freshdesk.
Step 1: Create a new Shopify trigger
- On the top right, click on New > New Konnector.
- Configure your trigger. Select Shopify as the Trigger app. (Please ensure your Shopify connection is validated and live)
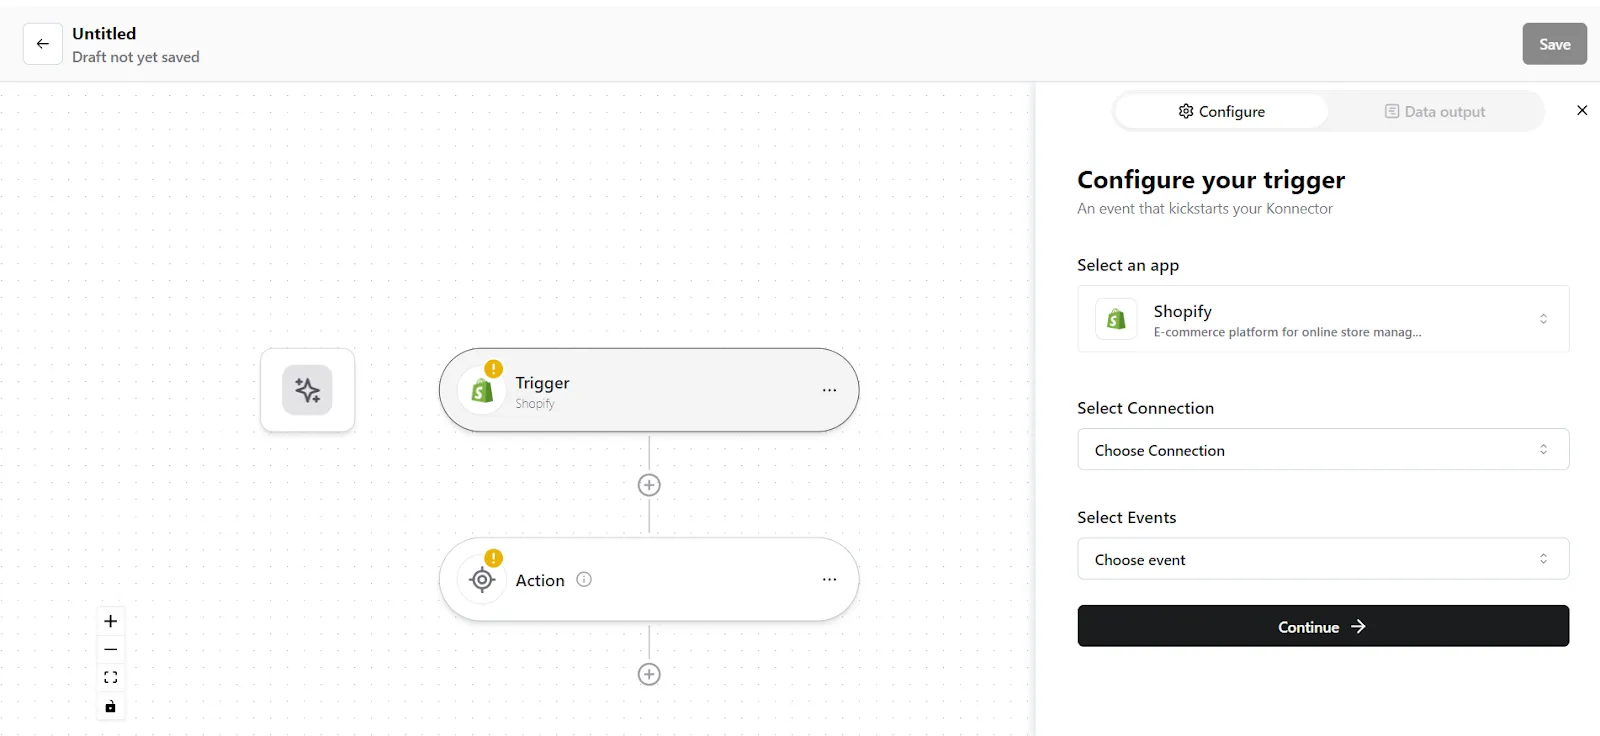
- Choose the app connection name that you had set up previously. For example, “Shopify connection”
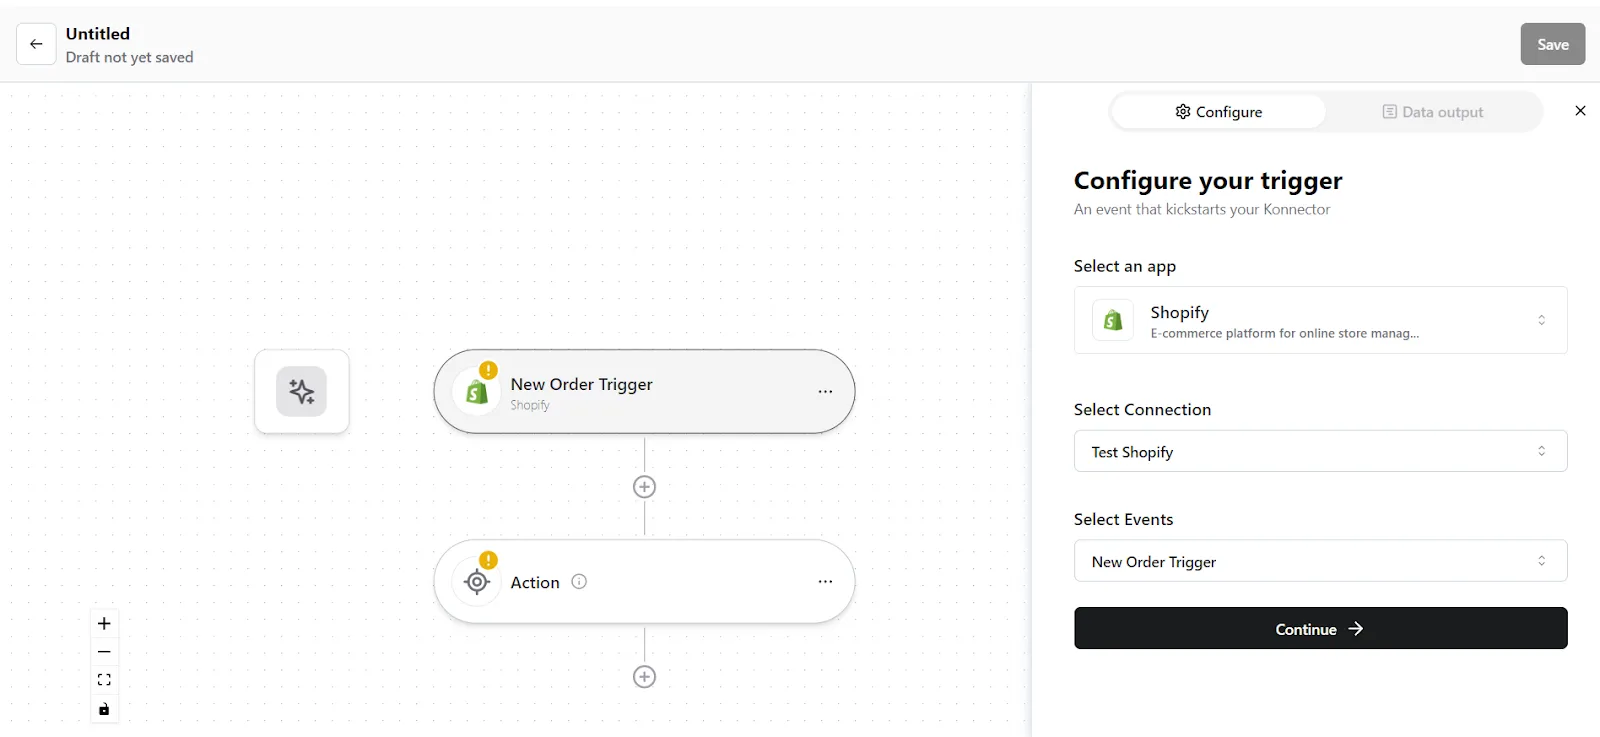
- Select the trigger event as "New Order made", and click on “Continue”. You will be taken to the data mapping pop-up.
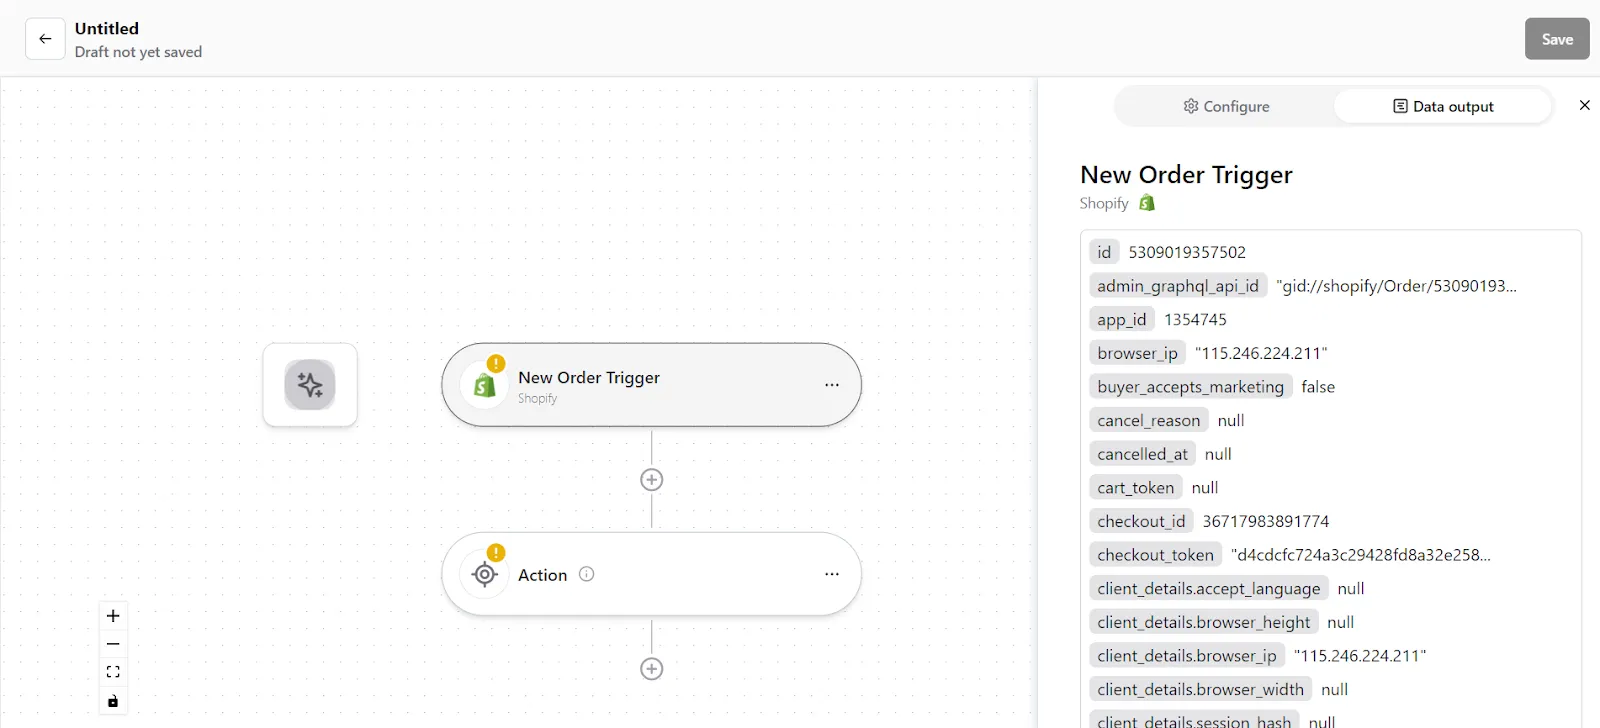
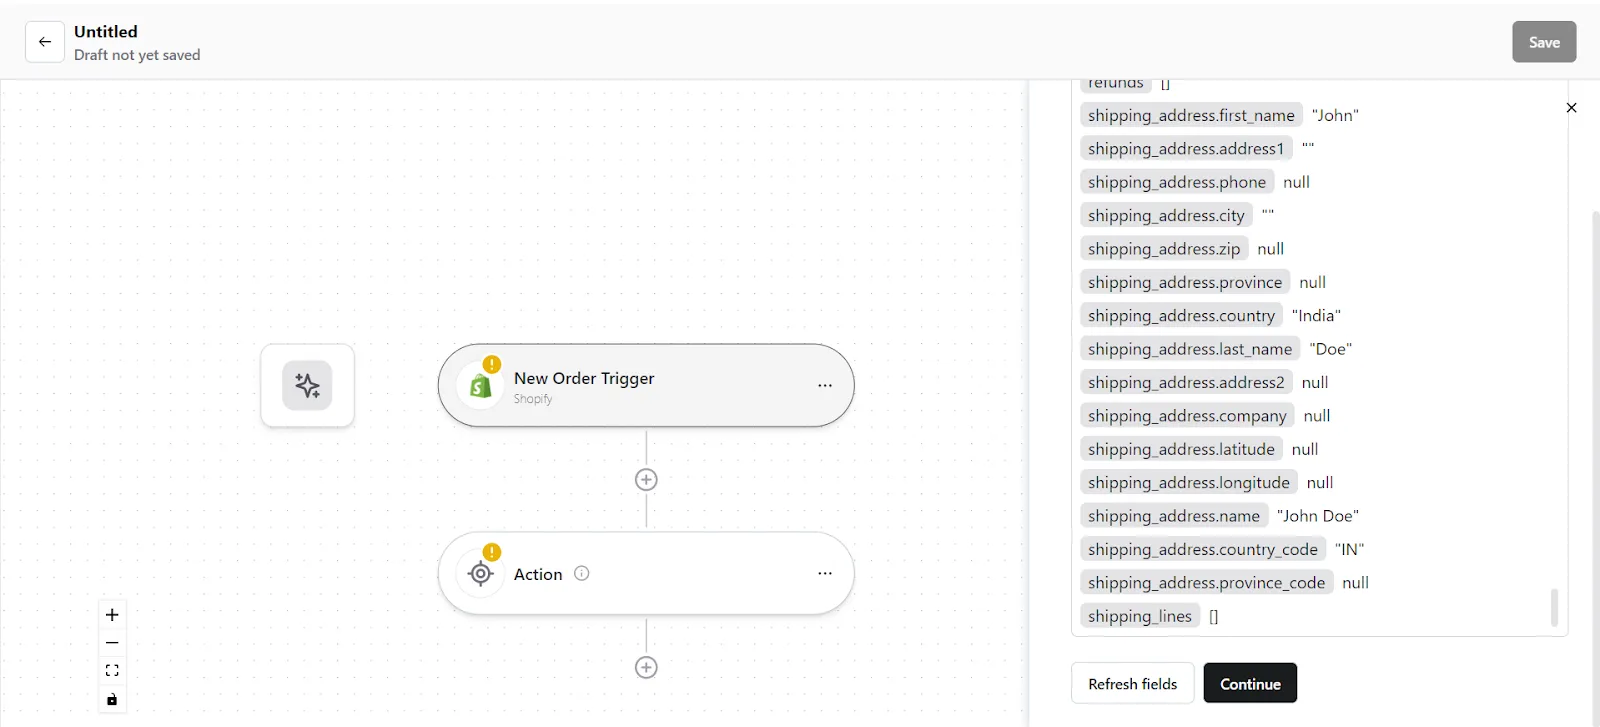
- Konnectify will show you the Data output with existing or sample data. If you have no data in the Shopify account, then please add it to validate the same.
- Once mapped data is available, click on "Continue".
Step 2: Create a new Action
- On your Konnector canvas, click on the "Action" section.
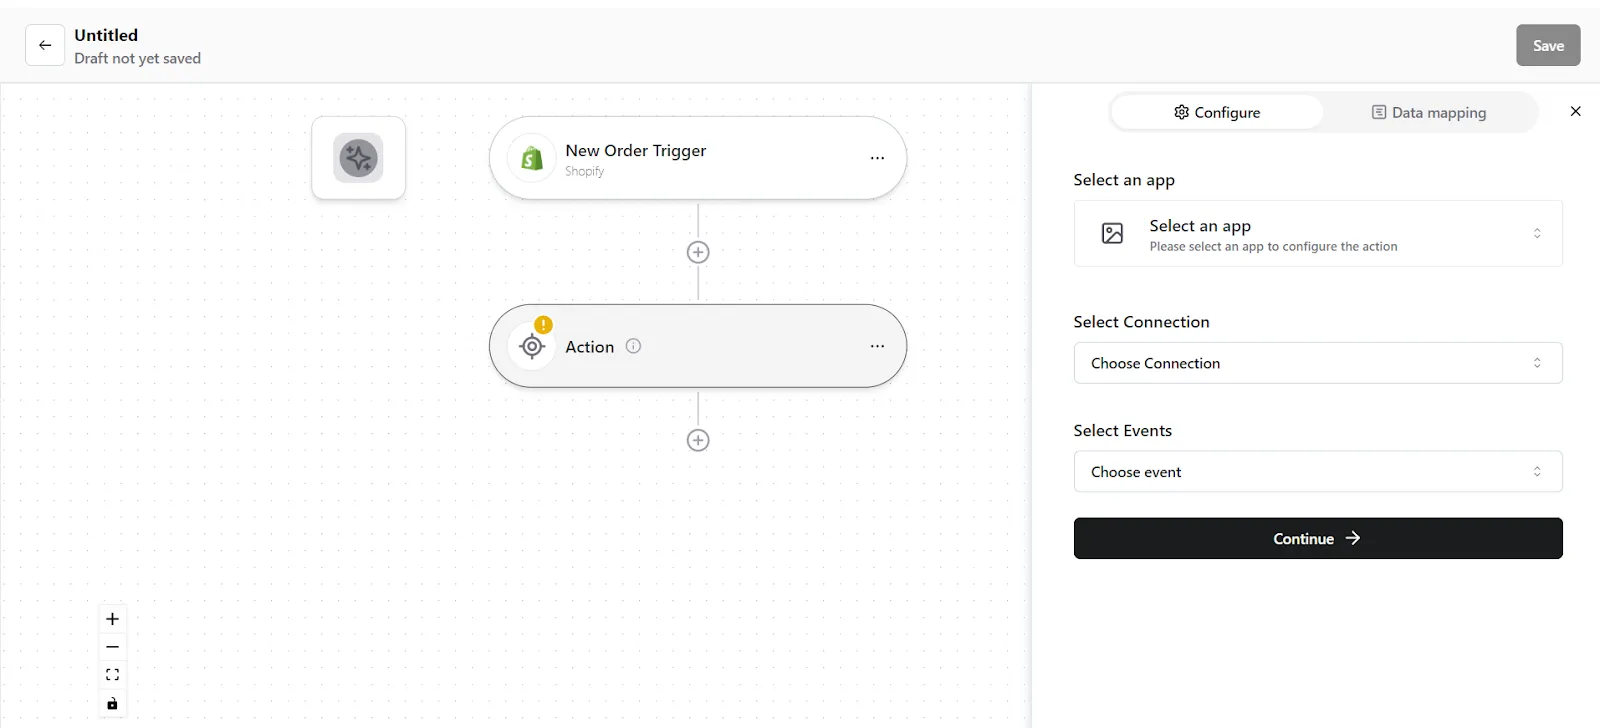
- Configure your action. Select Freshdesk as the Action app. (Please ensure your Freshdesk connection is validated and live)
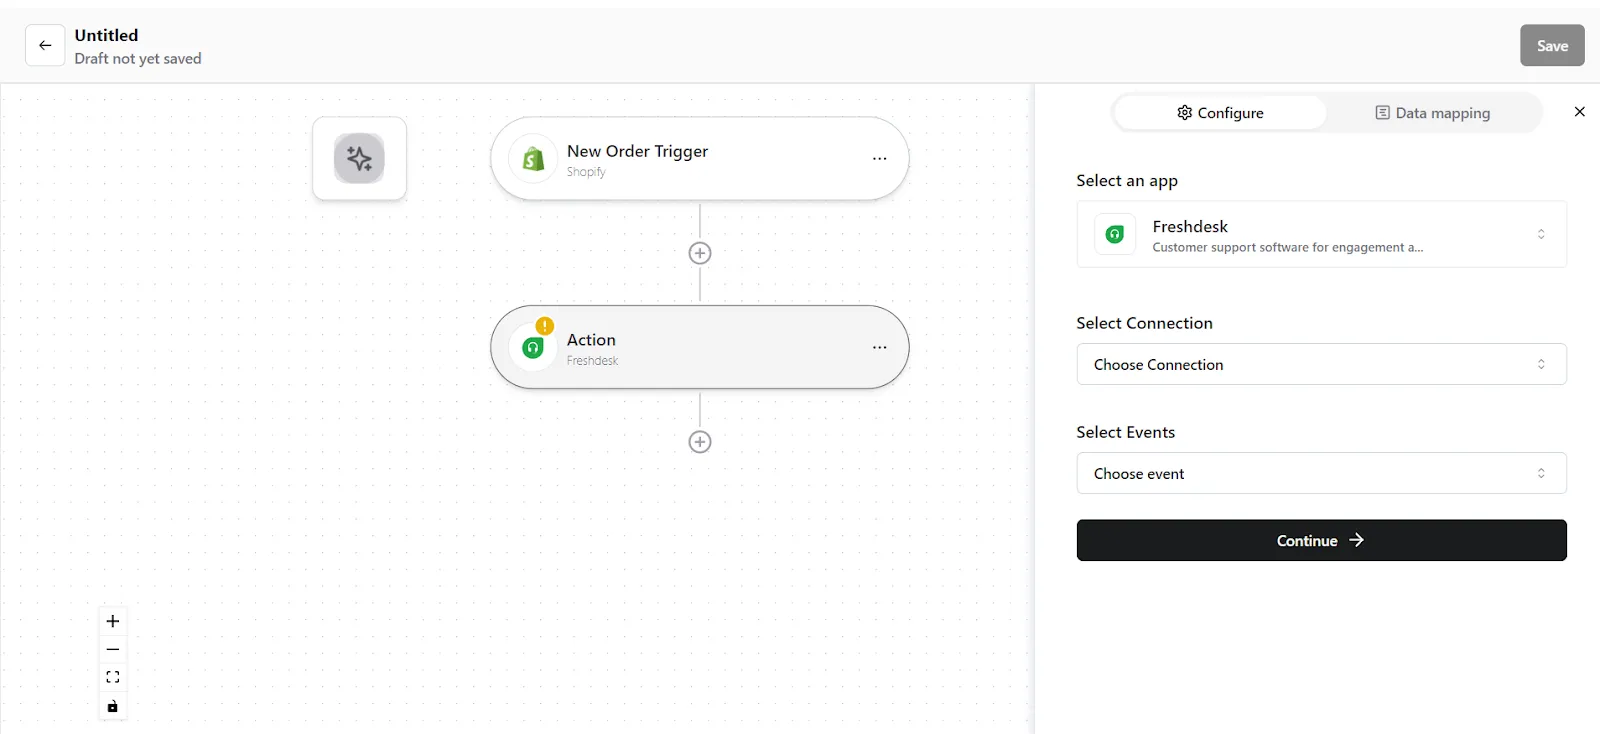
- Choose the app connection name that you had set up previously. For example, the “Freshdesk connection”
- Select the action event as "Create Ticket", and click on “Continue”. You will be taken to the data mapping pop-up.
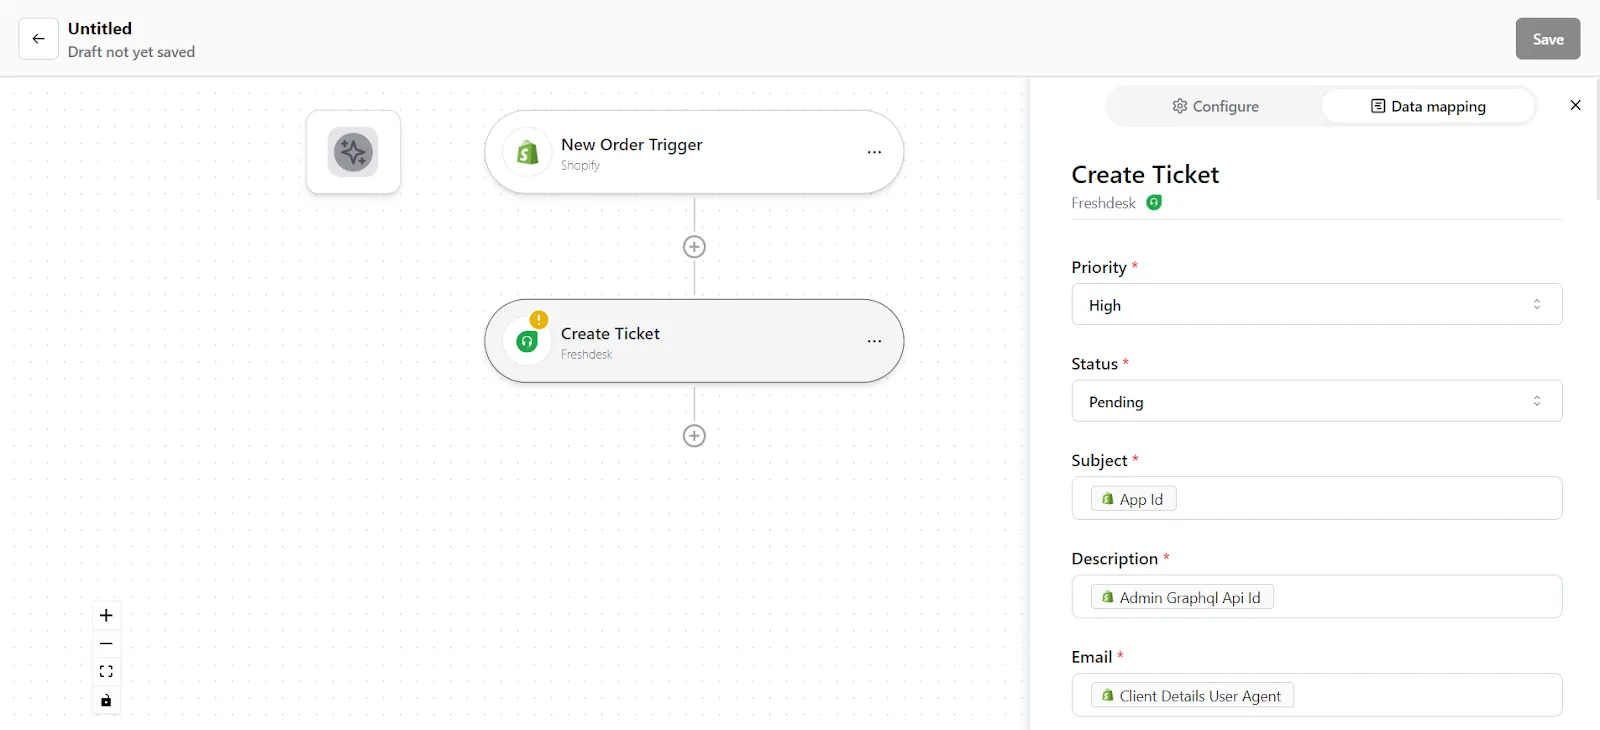
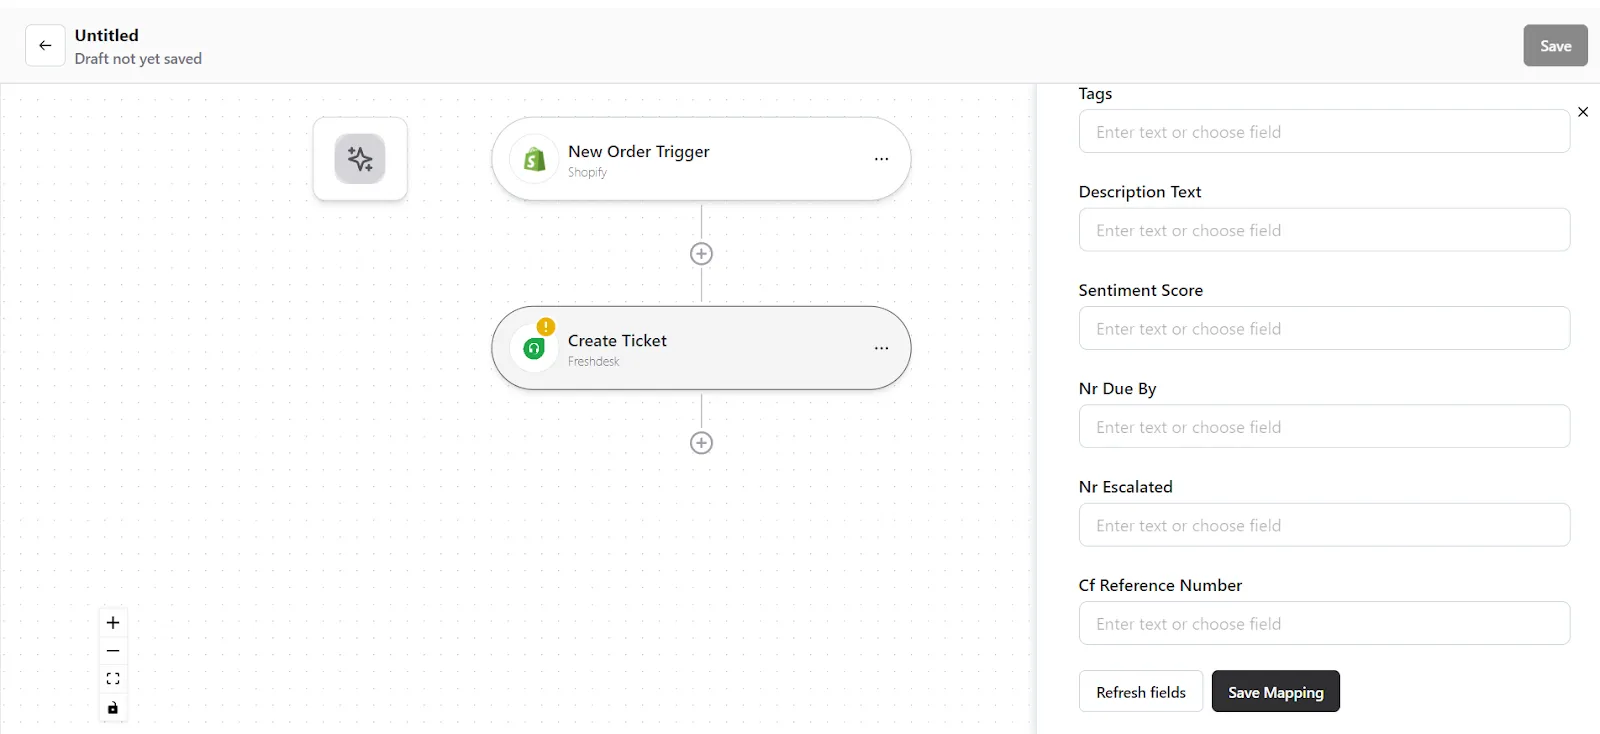
5. You can see the mapped data from your Shopify records. Check whether the right details have been added in the relevant fields, change it by clicking in the field.
6. Once you are certain, click on “Save Mapping”. Now your Action is ready.
Step 3: Save your Konnector
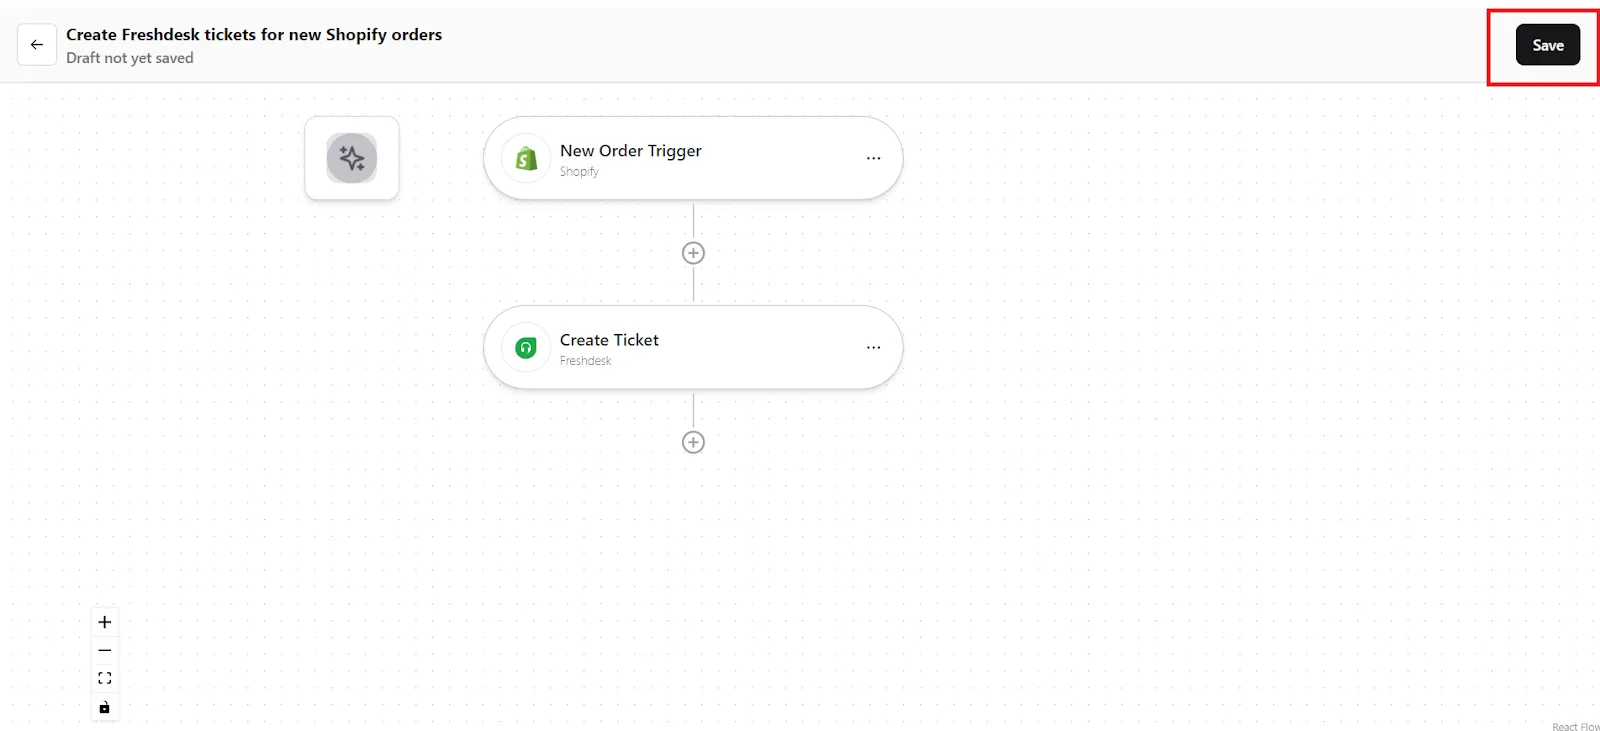
- Once you have set up your Konnector, give it a name. For example: “Create Freshdesk tickets for new Shopify orders”.
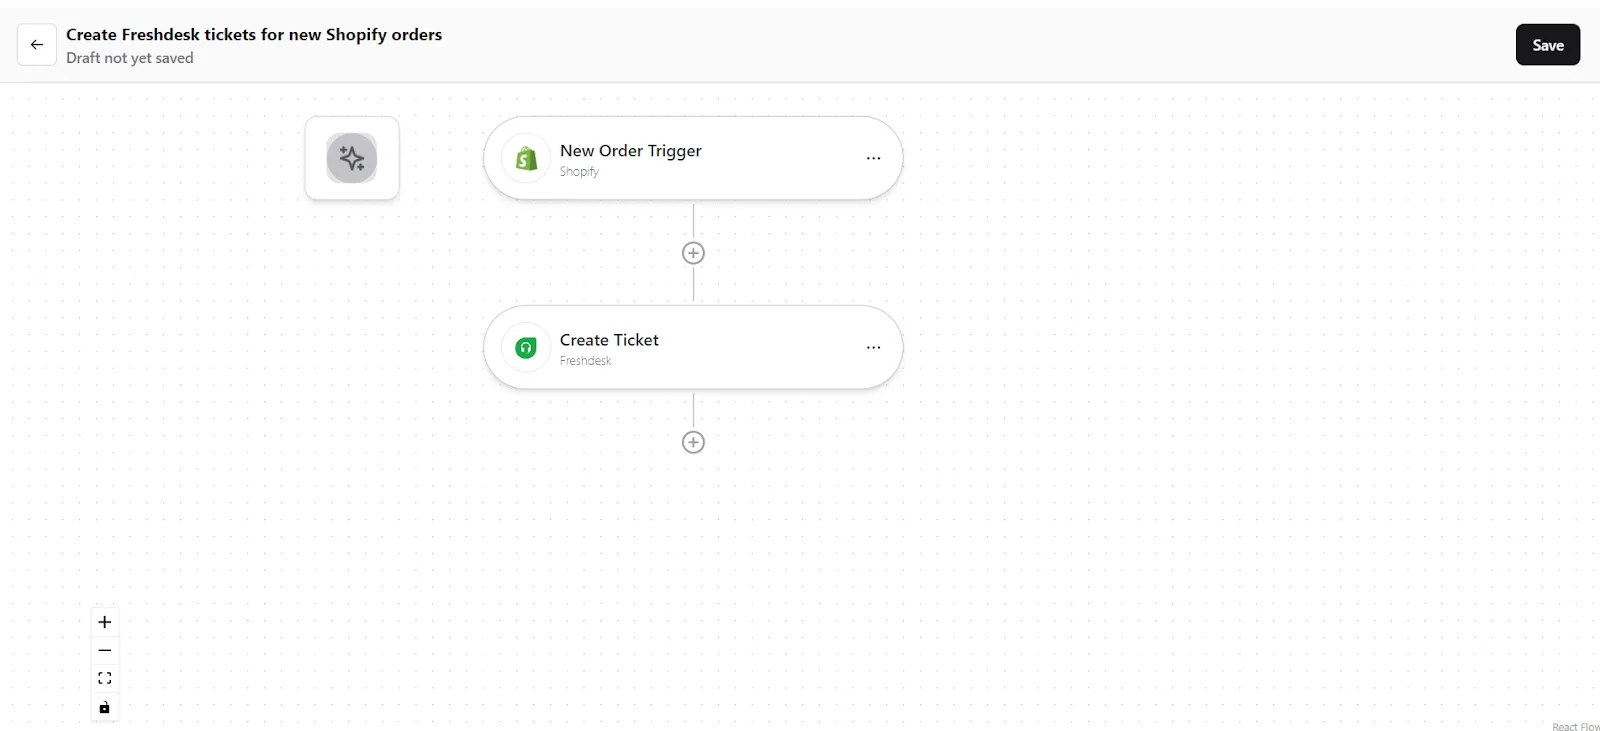
- Click on the "Save" button in the top right corner, to save your entire Konnector.
- Now you will be taken to the “All Konnectors” page. Here you can see all the Konnectors you have put together. To activate your Konnector, turn on the Status toggle.
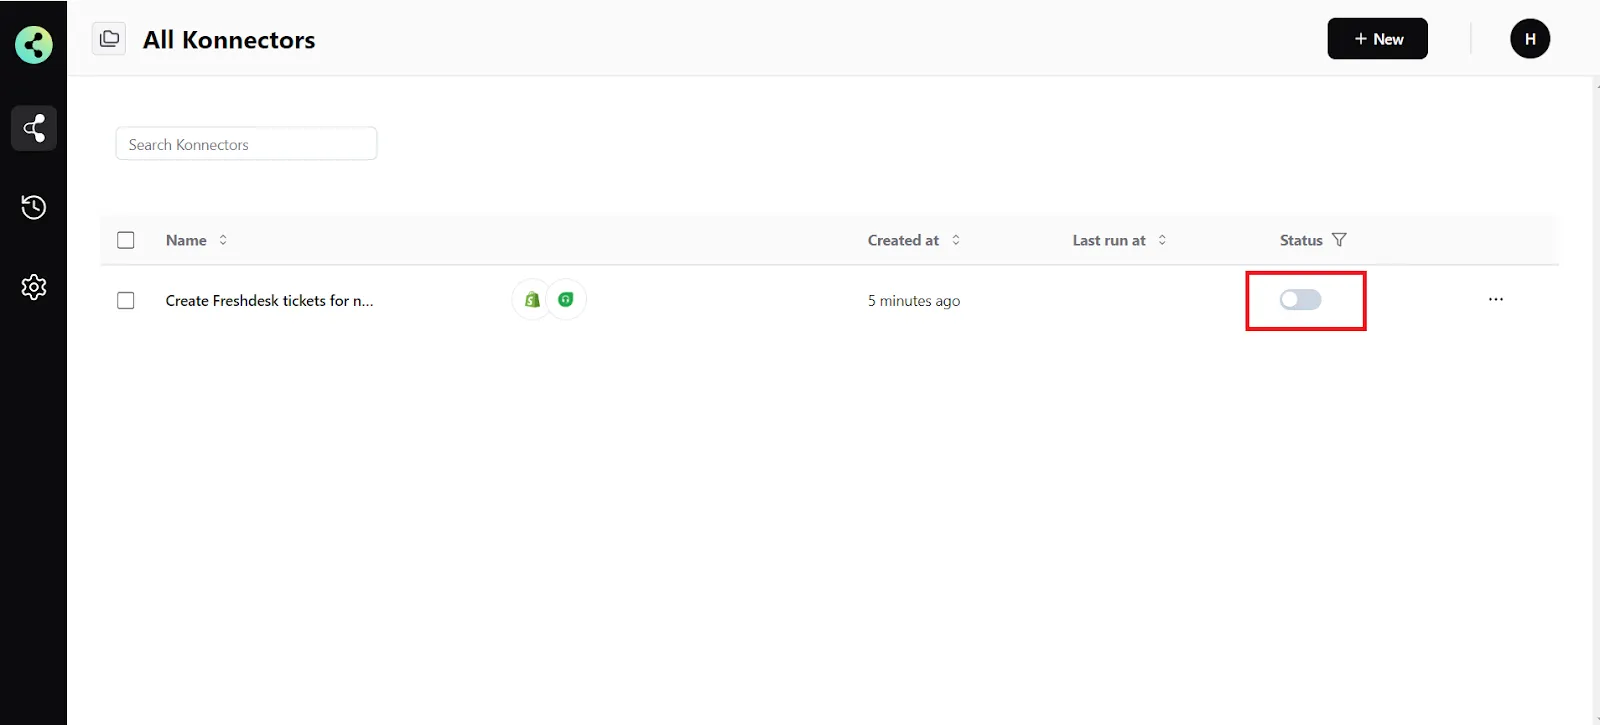
- You will get a success notification saying “Konnector Activated”
Connect your Freshdesk account to 100+ applications such as Shopify, Salesforce, Stripe, etc, and build automation.
Commonly Asked Questions
Q. How does the Freshdesk integration work with Konnectify?
A. Konnectify is a no-code SaaS integration platform designed for businesses of all sizes. You can easily connect Freshdesk and other apps on Konnectify, automate tasks through triggers and actions, and more.
You can create contacts, company details, and support tickets, update information, search tickets, and do much more with the Freshdesk integration on Konnectify.
Q. Do I need any technical skills to connect Freshdesk with Konnectify?
A. No, you don't need advanced technical skills to set up the integration. You can easily integrate Freshdesk and 100+ apps with our visual builder, without writing a single line of code.
Q. Is my data secure when using Konnectify to integrate Freshdesk with other applications?
A. Yes, Konnectify takes data security seriously and employs industry-standard security measures to protect your information. This includes encryption, access controls, and regular security audits to ensure that your data remains confidential and secure.
Q. Can I try out Konnectify before committing to it?
A. Yes. There’s a free trial period, where you can test out all the paid features for _ days, and see if Konnectify meets your need before you purchase. Check out our pricing plans. There’s also a free forever plan, built for individuals who need to automate on a basic level.
Q. How do I troubleshoot connection issues between Freshdesk and Konnectify?
A. If you encounter connection issues, ensure your Freshdesk app credentials are correct and that you have the necessary permissions. If the issue persists, contact us at support@konnectify.co